
Shot of a Scouting magazine article I did (featuring Pablo) which isn't available online anymore.
Nevertheless I used several mornings in a wood during my sabbatical to put as many of the setups I could find through their paces, with some of them also used as roofs for nights away. But before I go through the set ups I thought I'd start with a few bits that I do for the setting up of a tarp, most of them aren't Earth shattering but it just seems a good starting point.
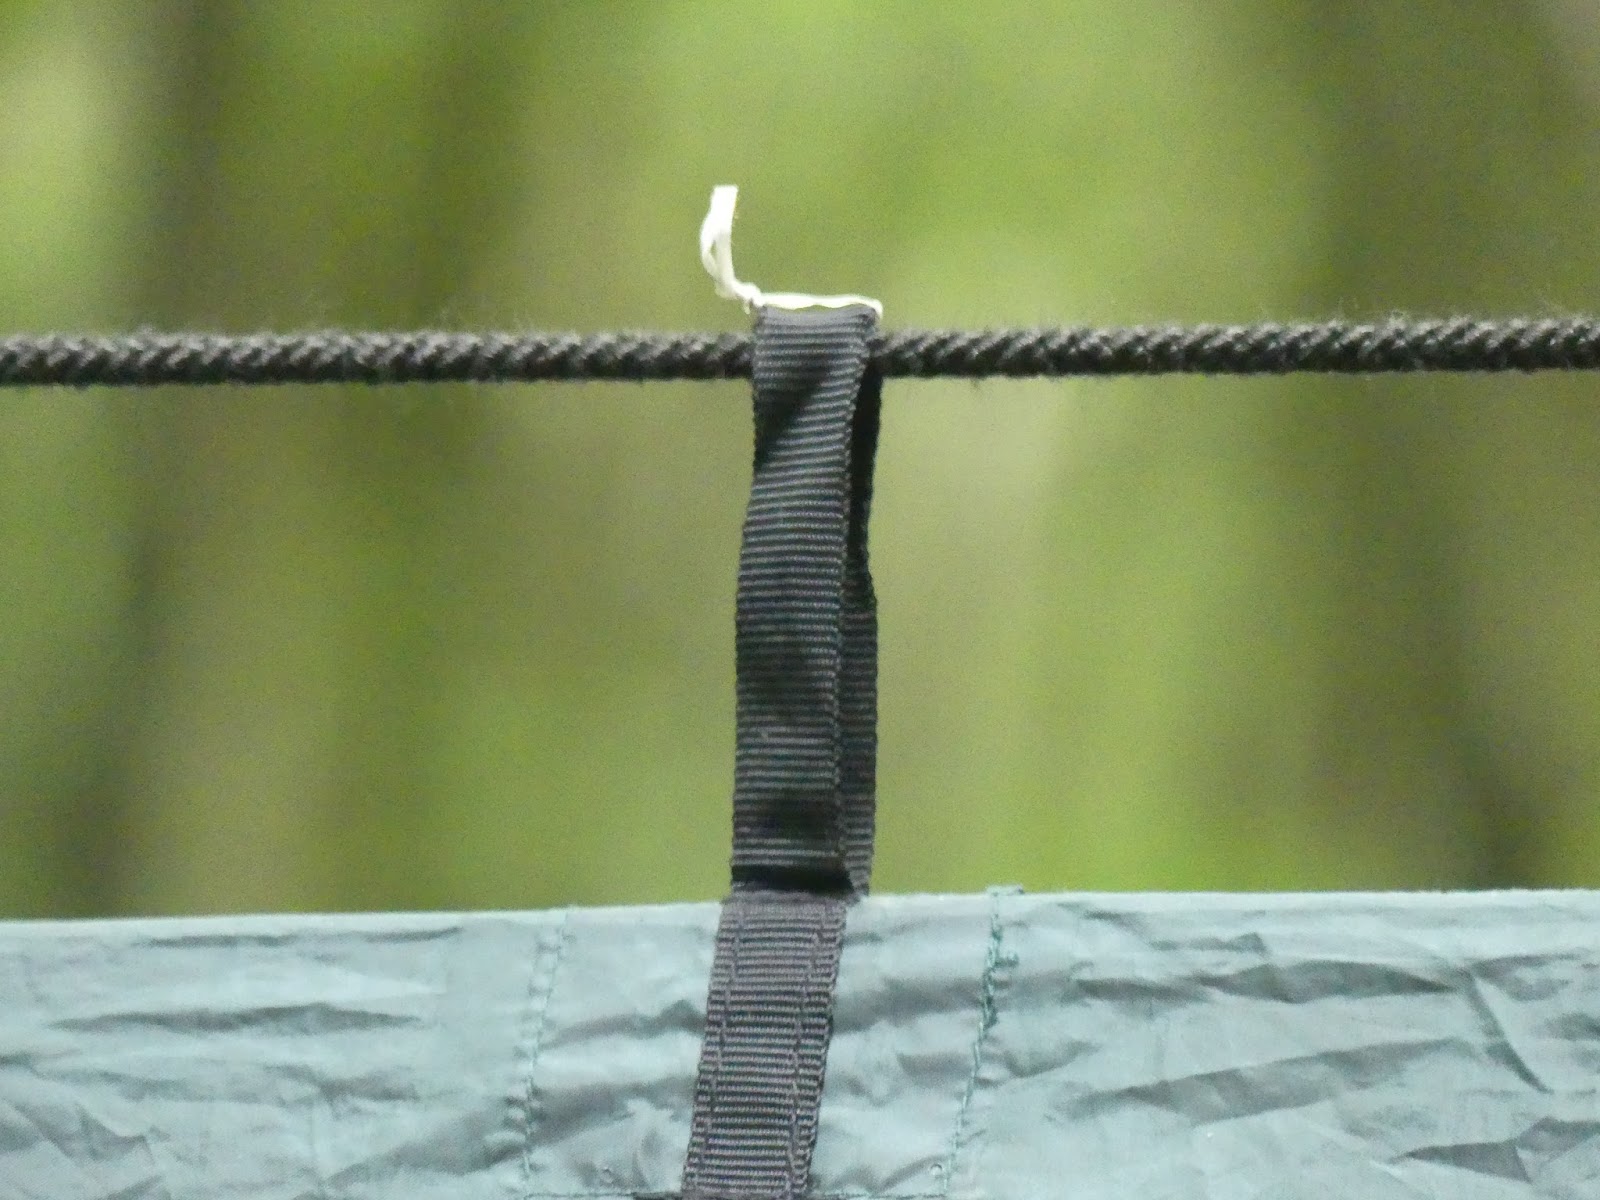

Firstly I use common or garden freezer bag wire ties to mark out the loops used with my two most used set ups (one tie on one row, two ties on the other) so that they are easy to locate when you set up. The ensemble on the right occurred this summer when I switched tarp lines and had a mid threading brainfart and swapped between one and two bag ties, of course this only came to light once I'd strung the ridge line up between two trees...
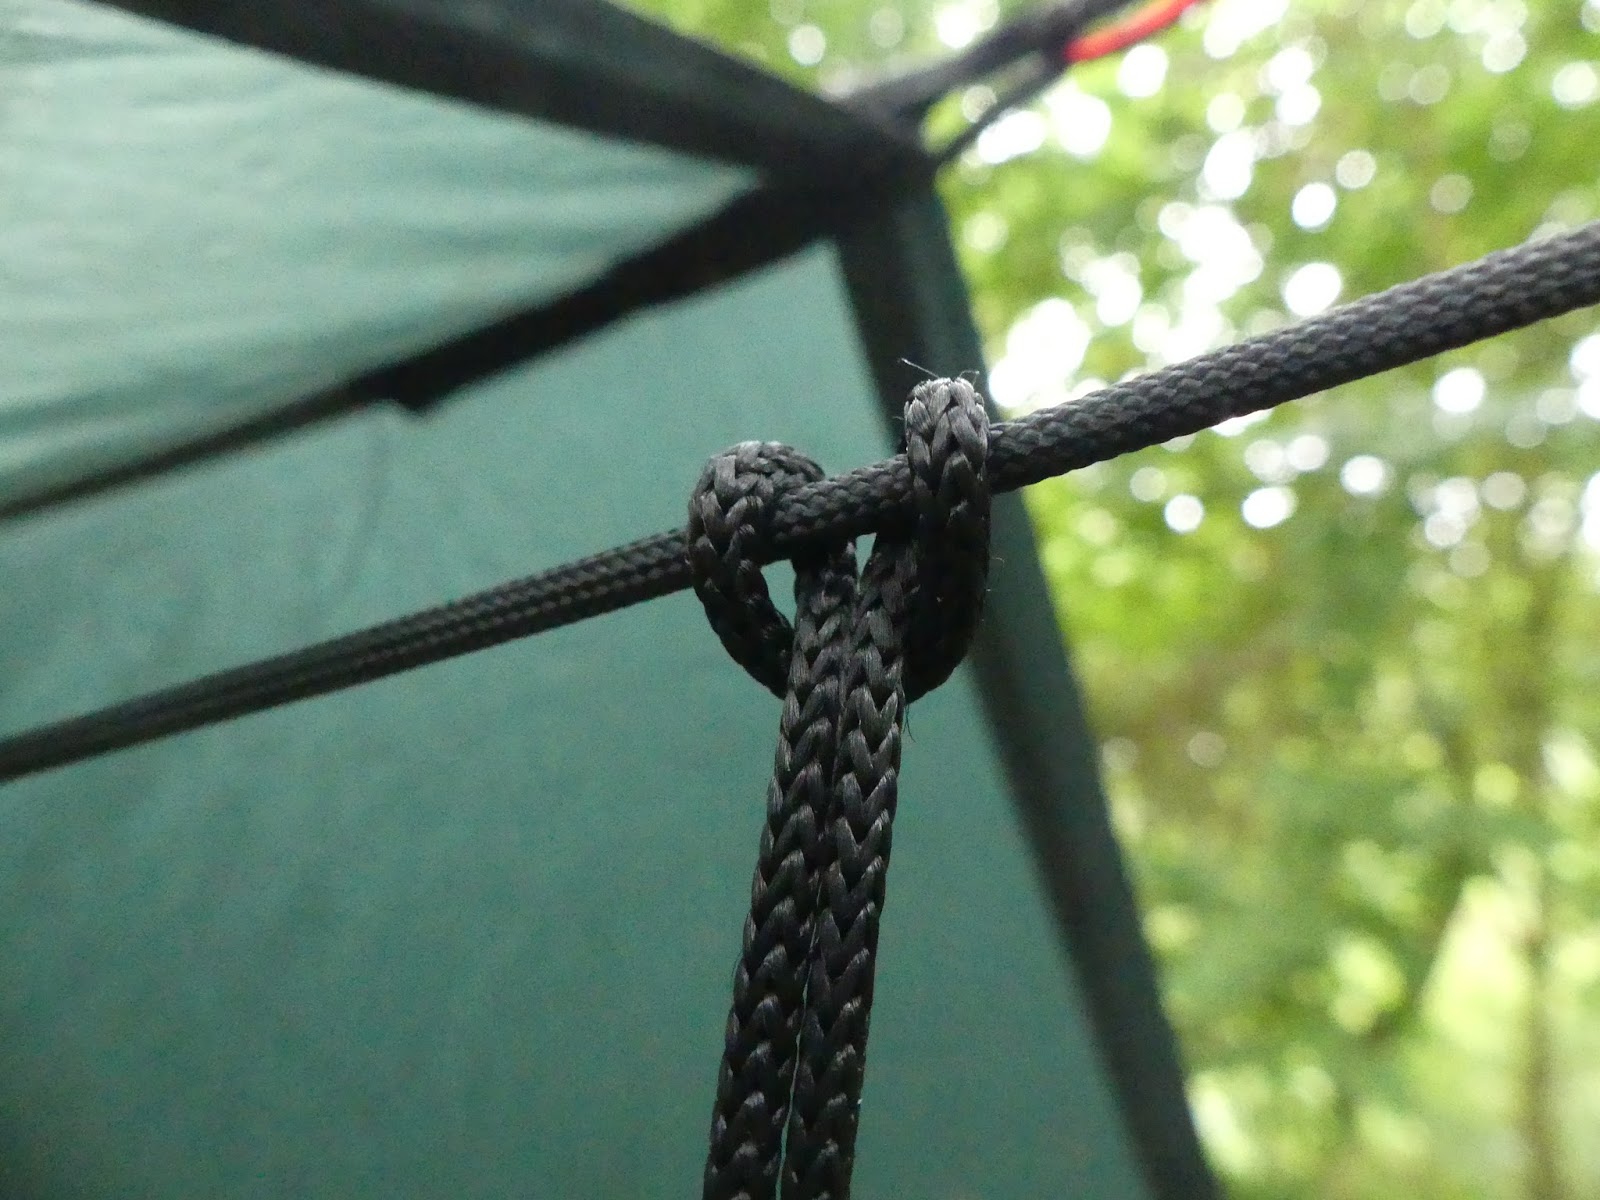

If the tarp is being used with a hammock I always run a paracord line just under the tarp's ridge, this is useful for hanging items off so that they are close at hand and for suspending the elasticated lines of a hammock underblanket from. Note the Lark's Head knotted cordage on the paracord line, this is a small piece used either end to wick rain away (they are also worth having on the ends of a hammock too), otherwise it will find the lowest point of the line and drip down...which will be the middle over your midriff.
One indispensable item to hang is the mini lantern featured above that I purchased from the Scout Shop online which is really handy when you lose the daylight. If you go for a short wander it makes a good beacon to navigate back to if needed, I've also used a glo stick too.


One trick to get your boots easily in the morning is to have them upturned on a stick in the ground, unless they are covered in wet mud I prefer to suspend them from the paracord line using a Highwayman's Hitch. If that's not possible I just leave them upturned below me on a plastic sheet from my sit spot bag that I take out and about.
It is possible to use positioning, orientation and set up to minimise the wind getting under a tarp. Now a hat or balaclava, even in Summer, is a must pack item but sometimes I find even if the set up is right you can still get a little puff of wind sneaking under. I found it kept me awake because I imagined a person gently blowing on my face. Now, unless I'm out for a still night, I use a terrorist style mask with just the eyes and mouth exposed to the outdoors which not only keeps you warm but also cuts out any breeze. I may take the sewing machine to it however became the only down side is if it twists it goes over your mouth but to me that's a small and occasional trade off.
All the set ups are done using a trusty 3 x 3 metre DD Hammocks tarp. It is a good bombproof tarp but despite the fact that 3 metres sounds long it is actually quite tight fitting a hammock under it with much clearance at each end.
When you are looking for a suitable hanging space you'll need to pace out a minimum of 5 adult paces is about your minimum to allow for tensioning the two ends.This 3 x 3 tarp is about 3.5 of my paces long and the gap between the trees used is about 6 paces. I just find this handy to know because you can pace the distance between two trees to check that they are suitable.
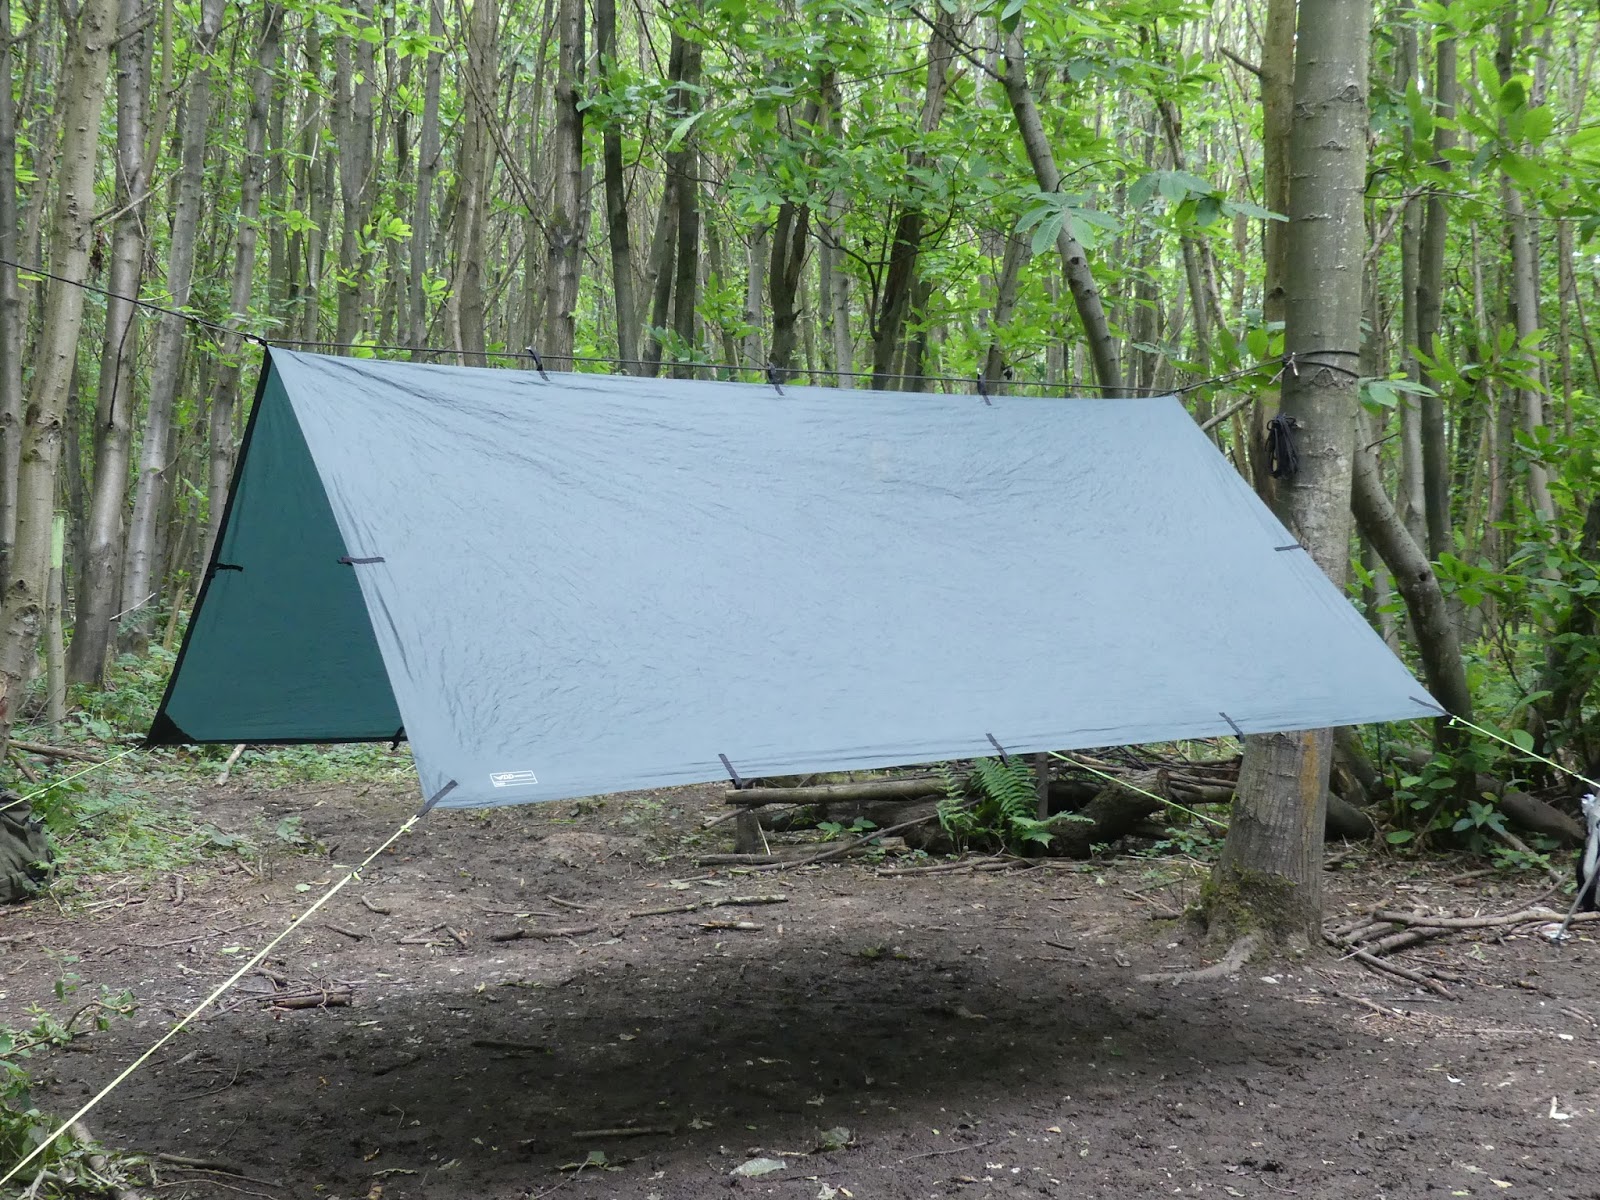
The House Roof


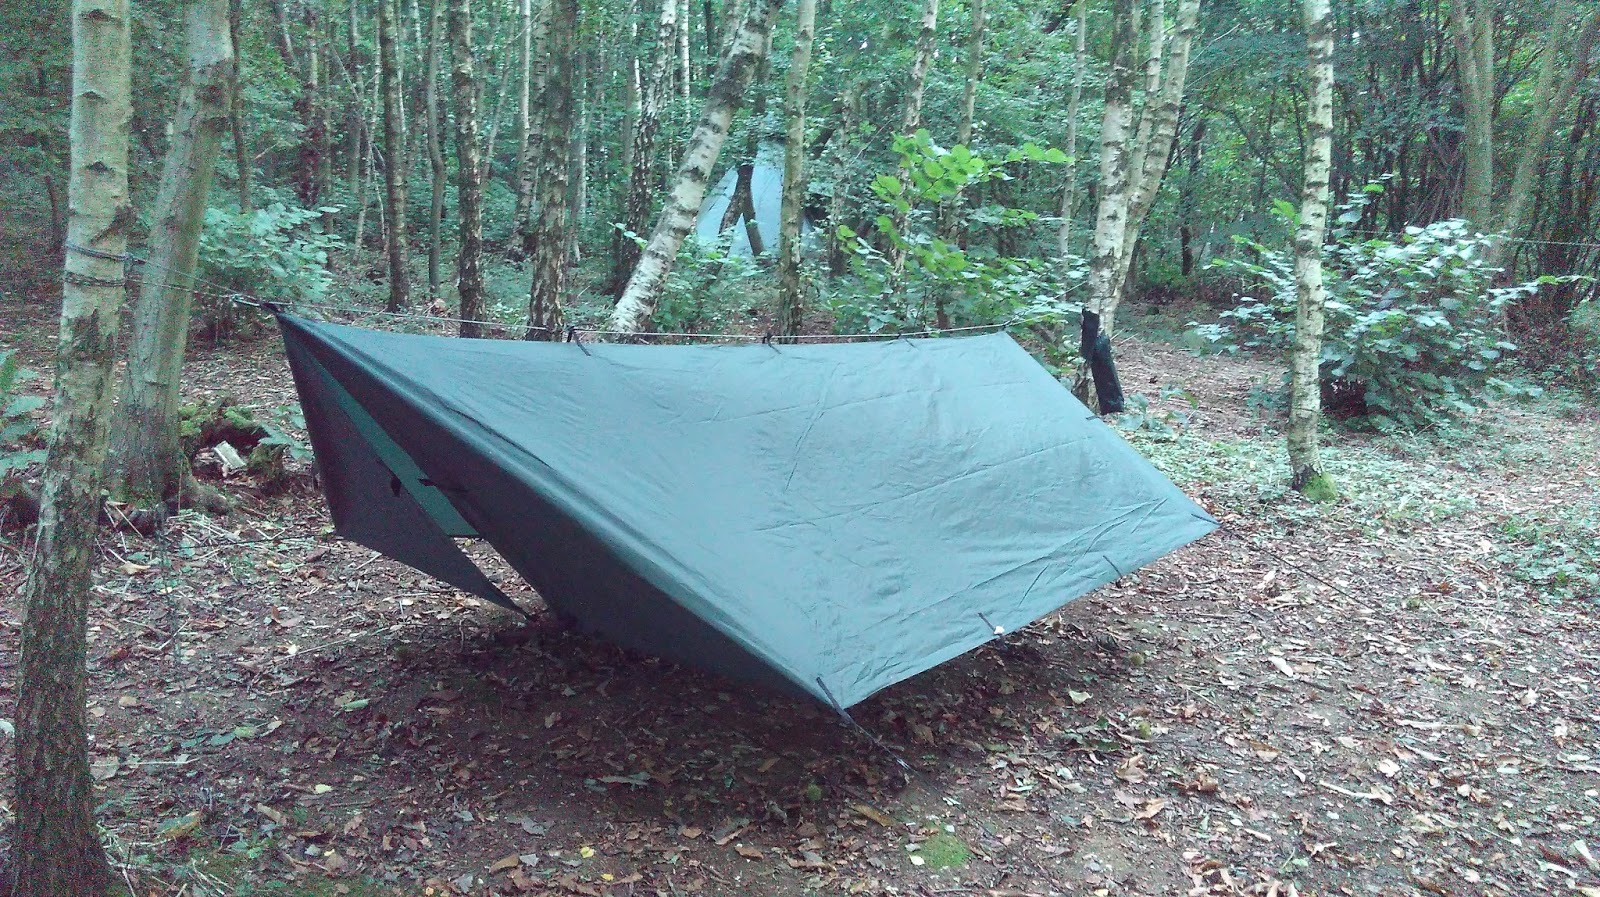
This is the classic setup and I called it the house roof due to the fact that it reminds me of well, a house roof. Whether used low down with a bivvy bag or higher with a hammock this set up usually only needs a guy line in each corner. The sides can have shallower angles than shown and indeed one higher than the other supported, if needs be, by a pole in each corner. If rain is due one end of each side can be angled slightly lower than the other to encourage rain to run off the lower end (see the lipped bivouac later on). persoanlly i don't usually bother...
The Burin (or Trapezoid)

This shape reminded me of a flint cutting tool Will Lord did an article on in Bushcraft Magazine, hence the title I've given it. Pictured on an overnighter I did after a bespoke Jack Raven medicinal plants day it gives you a significant amount of cover at one or both ends. The ridge is strung up as if you were going to erect the house roof configuration, but you peg it out one loop in from the corners (at 45 degrees), and the corner loops are then pulled inside and pegged near to the opposite side of the tarp. if you click to enlarge the right hand side picture you can clearly see this. It works well at ground level but isn't as easy to line up with a hammock in a 3 x 3 tarp.
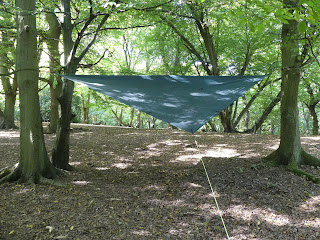
The Diamond

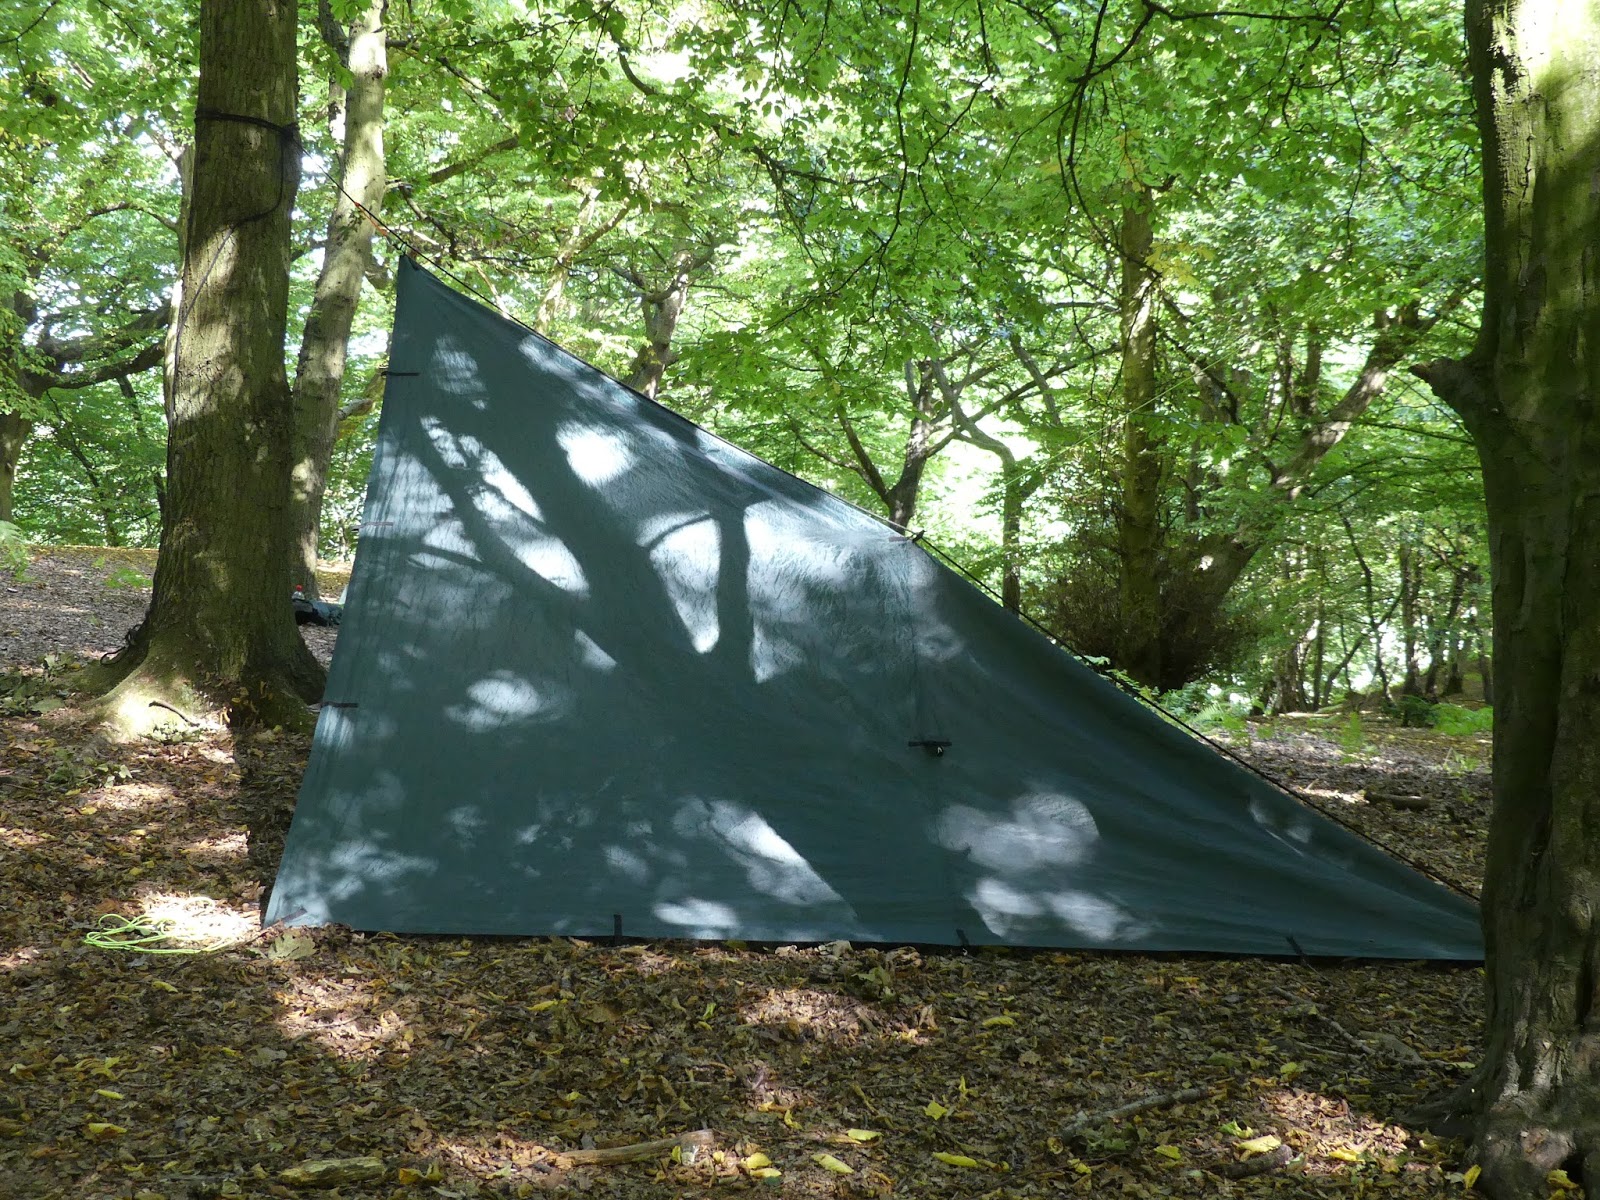
This effectively is the house roof tarp turned through 90 degrees. This then gives you the diagonal length of the tarp along the ridge line at roughly 5 of my paces but obviously this means that the cover is varied down the side. Whilst I think it looks stylish I rarely use it as I don't like the fact that it only has three attachment points along the ridge, and one guy line securing each side. To be honest I personally feel that this is a fair weather set up. It could be lowered for ground dwelling of course but I think there are superior set ups both in terms of coverage and view.
Finnish Loue Style


A Loue is a Finnish style open fronted shelter and I decided to try and replicate it as closely as possible by tipping the diamond set up down at one end. As stated earlier I don't think the diamond set up lowered to ground level is the best choice but this works. As it was a previous set up angled down I secured the ridgepole at the back with two tent pegs pushed firmly into the ground when perhaps if using it in anger two pegs through the tarp loop and a guy line or similar to the tree would suffice. I tried pulling the spine up from the rear with first a guy line and then a walking pole, the latter of course reduces your workable internal footprint a tad more then a guy line.
It's actually not a bad setup but the original has a pole angled slightly forwards at the front for support. It is worth noting as well that a Loue has a slightly different shape to this tarp setup.
The Mantis


I thought the the two front edges albeit tenuously, reminded me of a Mantis with it's front limbs poised. This was partly based on an 'origami' design and partly through playing around. It is strung between two trees through the centre with the rear fairly upright and pegged close to the ground one loop in from the corner. The resulting two flaps are pegged in towards the sleeping area as small sides. The middle loop of the front is supported with a stick whilst the edges are supported one loop in from the corners using walking poles.
The corners are pegged out with guy lines lower than the middle to give great protection and view. The 'mantis' limbs can also fold down for an almost tent like feel (see the right hand side image). It also works well with a diagonal frontage, looking at the left hand picture imagine the central pole removed and the right hand side 'mantis' limb dropped to the ground.
The Lipped Bivouac


This is basically a house roof style set up but the ridge line goes through a different set of loops to make the split one quarter to three quarters with the height of the ridge line up the trees determining the angle of the back with a cracking view out whatever angle you adopt. The only thing with a DD tarp (and maybe others) is, like the diamond, this setup can only utilise three tarp loops so attention must be paid to the tensioning of the front flap and in this instance I've angled down the left hand side ever so slightly to help rain flow off one way but it's not something I often do to be honest.
The Clam
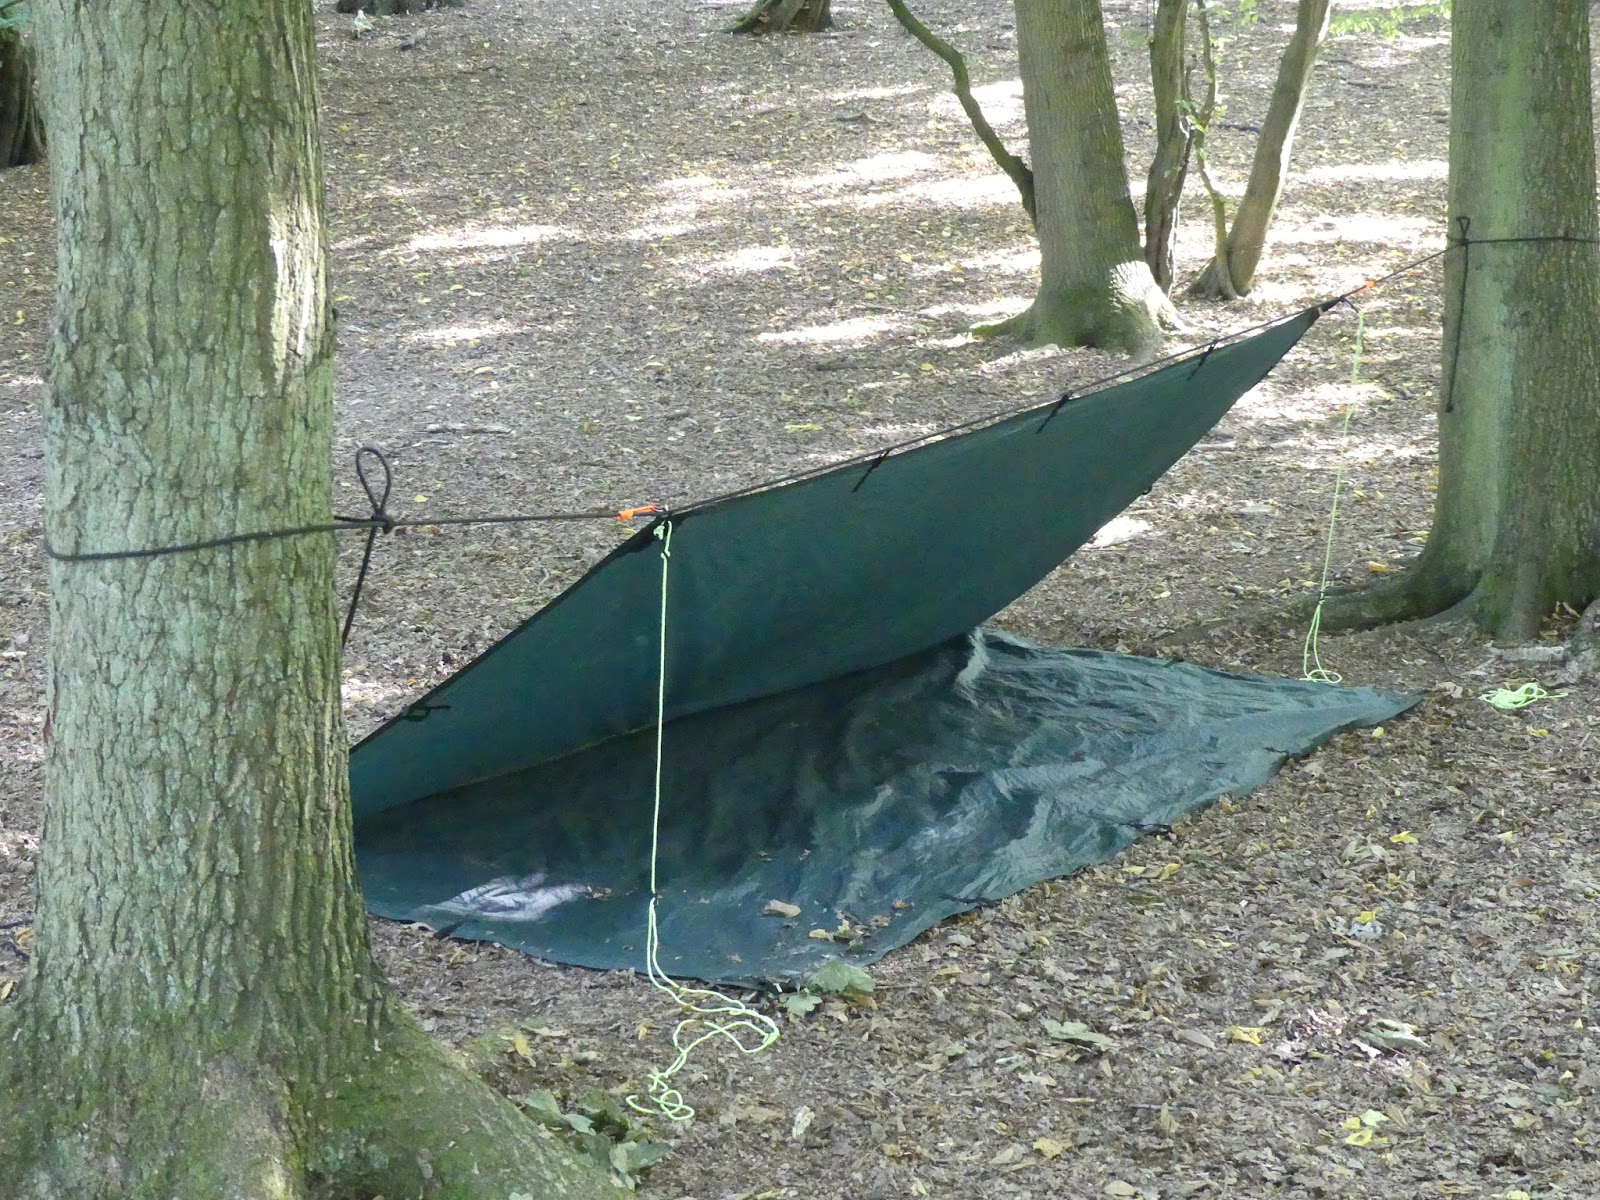
Effectively a house roof configuration turned through 90 degrees. Perhaps there may potentially be issues with inclement weather getting under the angled tarp but it was as low as I felt I could go without making the space unusable. I've also seen a plan for a tarp configuration on the 'origami' images mentioned earlier that effectively makes an equilateral triangle tube (the Toblerone?) but certainly this tarp isn't really calibrated for that as it is looped for quarters not thirds whichever way you turn it.
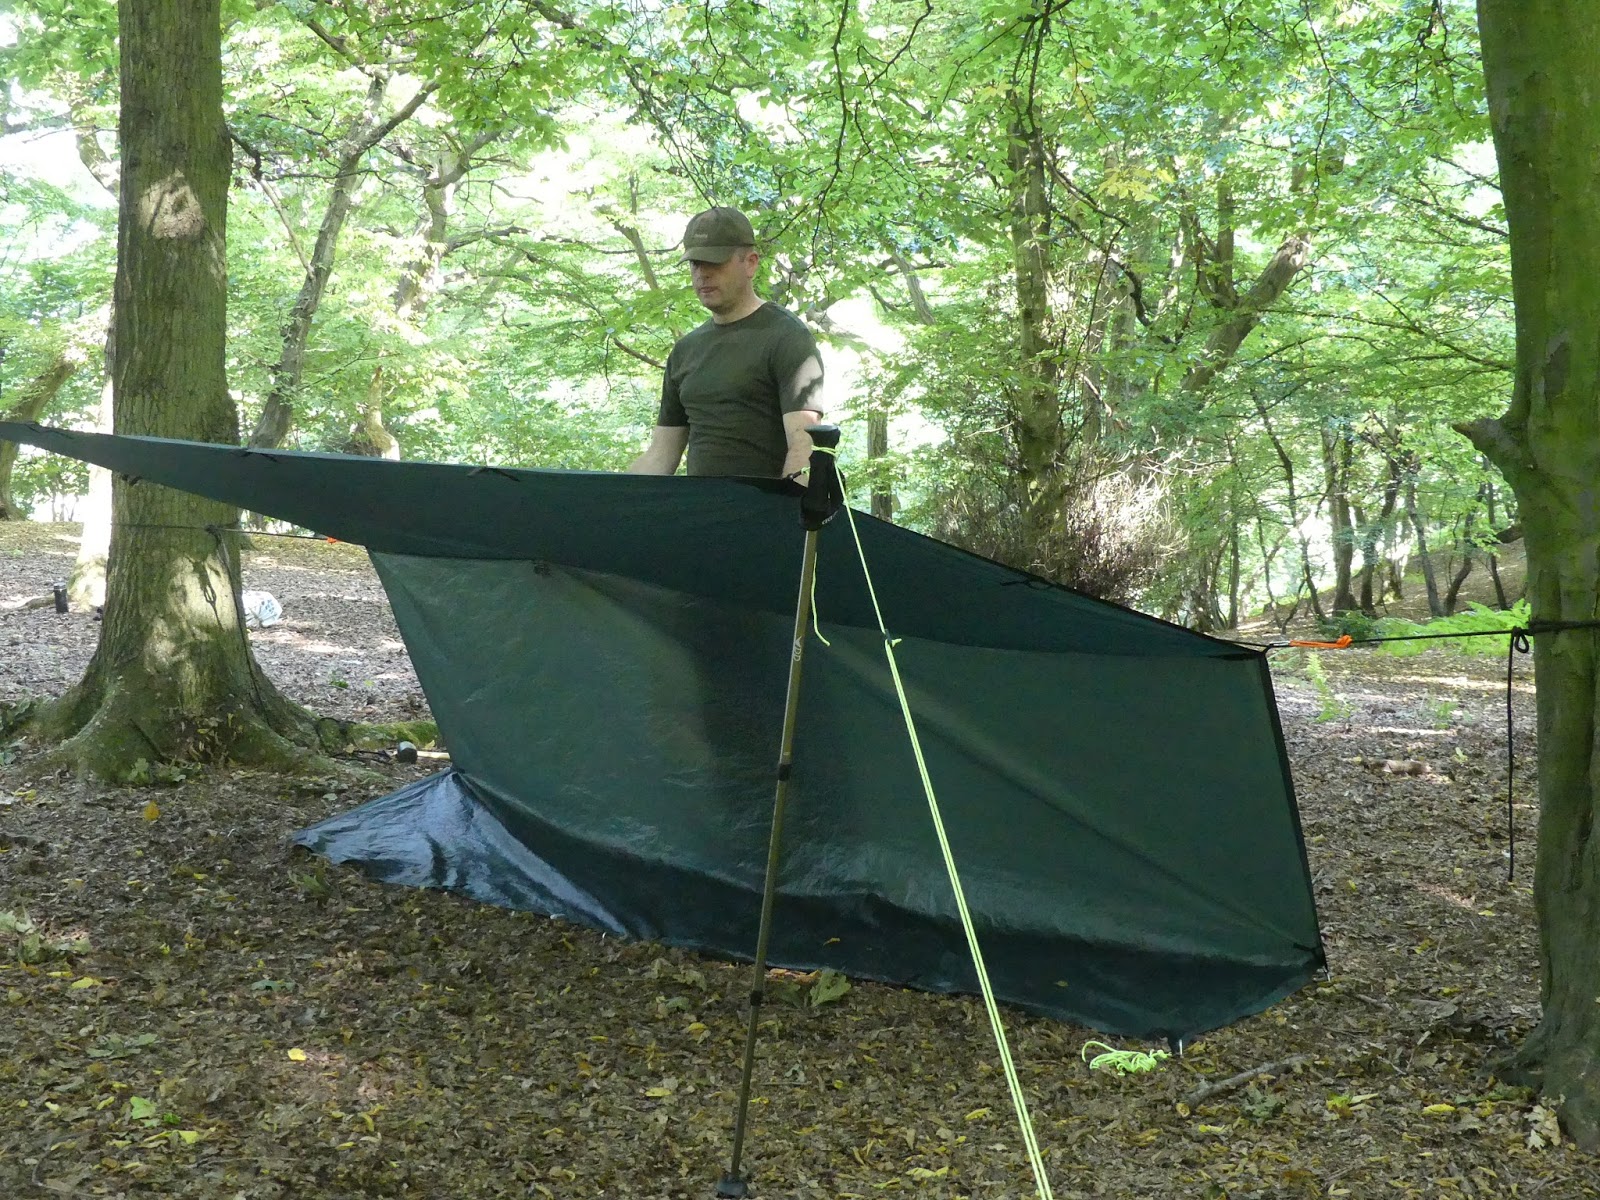
I tried a hybrid of the supposed Toblerone and the Clam with one quarter as a 'groundsheet' as per the 'origami' images, one quarter as the rear, and half as a roof. It took ages of faffing to get some semblance of order, the roof was a nightmare to tension even using walking poles, and I felt that another support of some kind (me in the above picture) was need at the rear, and yes it looks like I'm having a wee rather than adding the tension...Not a variation to linger long in the memory.
I genuinely had fun working through lots of the setups with very mixed results, and whilst there are others out there that would do a decent job I felt those covered were pretty much representative of the functional styles out there. And to be honest after much investigation I still think the house roof will be the set up of choice with the burin, loue and mantis also prevailing.
Suggested further reading:-
Sit Spot Bag
Tarp and Hammock Knots
The Three Main Tarp Knots
Tarp Knots For Cub Camp
3x3 tarp tent
No comments:
Post a Comment