Having made an atlatl and dart with Will Lord during my sabbatical I thought it was high time to sort out a evening for our Cub pack that not only features a bit of atlatl action but some Dutch (or Swiss) arrow production too, but more on the evening later.
I've detailed how to make an atlatl set and Dutch arrows on this blog page but as a quick resume I'll run through what I did. Although the making of them is fairly straightforward the prep actually lasted over several months...collecting feathers!


I used shop bought lengths of dowel, it's worth having a recce as the price and quality can vary. you can get four lengths for the Dutch arrows out of the average (12 mm dia x 2400 mm piece). Each shaft is therefore 60 cms long funnily enough.
It doesn't take long to process them once you've marked them up, as you can see above I leant on the lengths on a work bench and just cut them through.


I needed to have about 25 pieces so that meant cutting up seven dowel lengths to make sure and to deal with any breakages. I used a small fixed blade knife to tidy up any messy cuts but was careful not to make the ends too pointed.

After prepping and tidying I lined them all up as shown and put a pencil across them all at about 20 cms from one end.

The reason for the pencil mark is that each length needs a notch carving in it, which is used when made into a dart, to launch it.

The fletchings are going to be on the left hand side of this shaft and the shape shown is important. The dowel is fairly soft wood so carving them all won't take too long.

That's the most labour intensive part done, or is it? I wanted the cubs to make a Dutch arrow with feathers as their fletchings and it takes a long time to collect pigeon feathers, especially as the symmetrical ones are best. I'd hoped to score some at the Bushcraft Show this Summer but typically I didn't chance across a single pigeon prep demonstration. You can equally make some viable ones out of card or foam too if you don't want to collect avian cast-offs.

Order some paracord then cut and seal as many 100 cm lengths as you have young people. This is longer than the dart and perhaps a little on the generous side but you need it to be longer as some of it wraps around the thrower's hand.


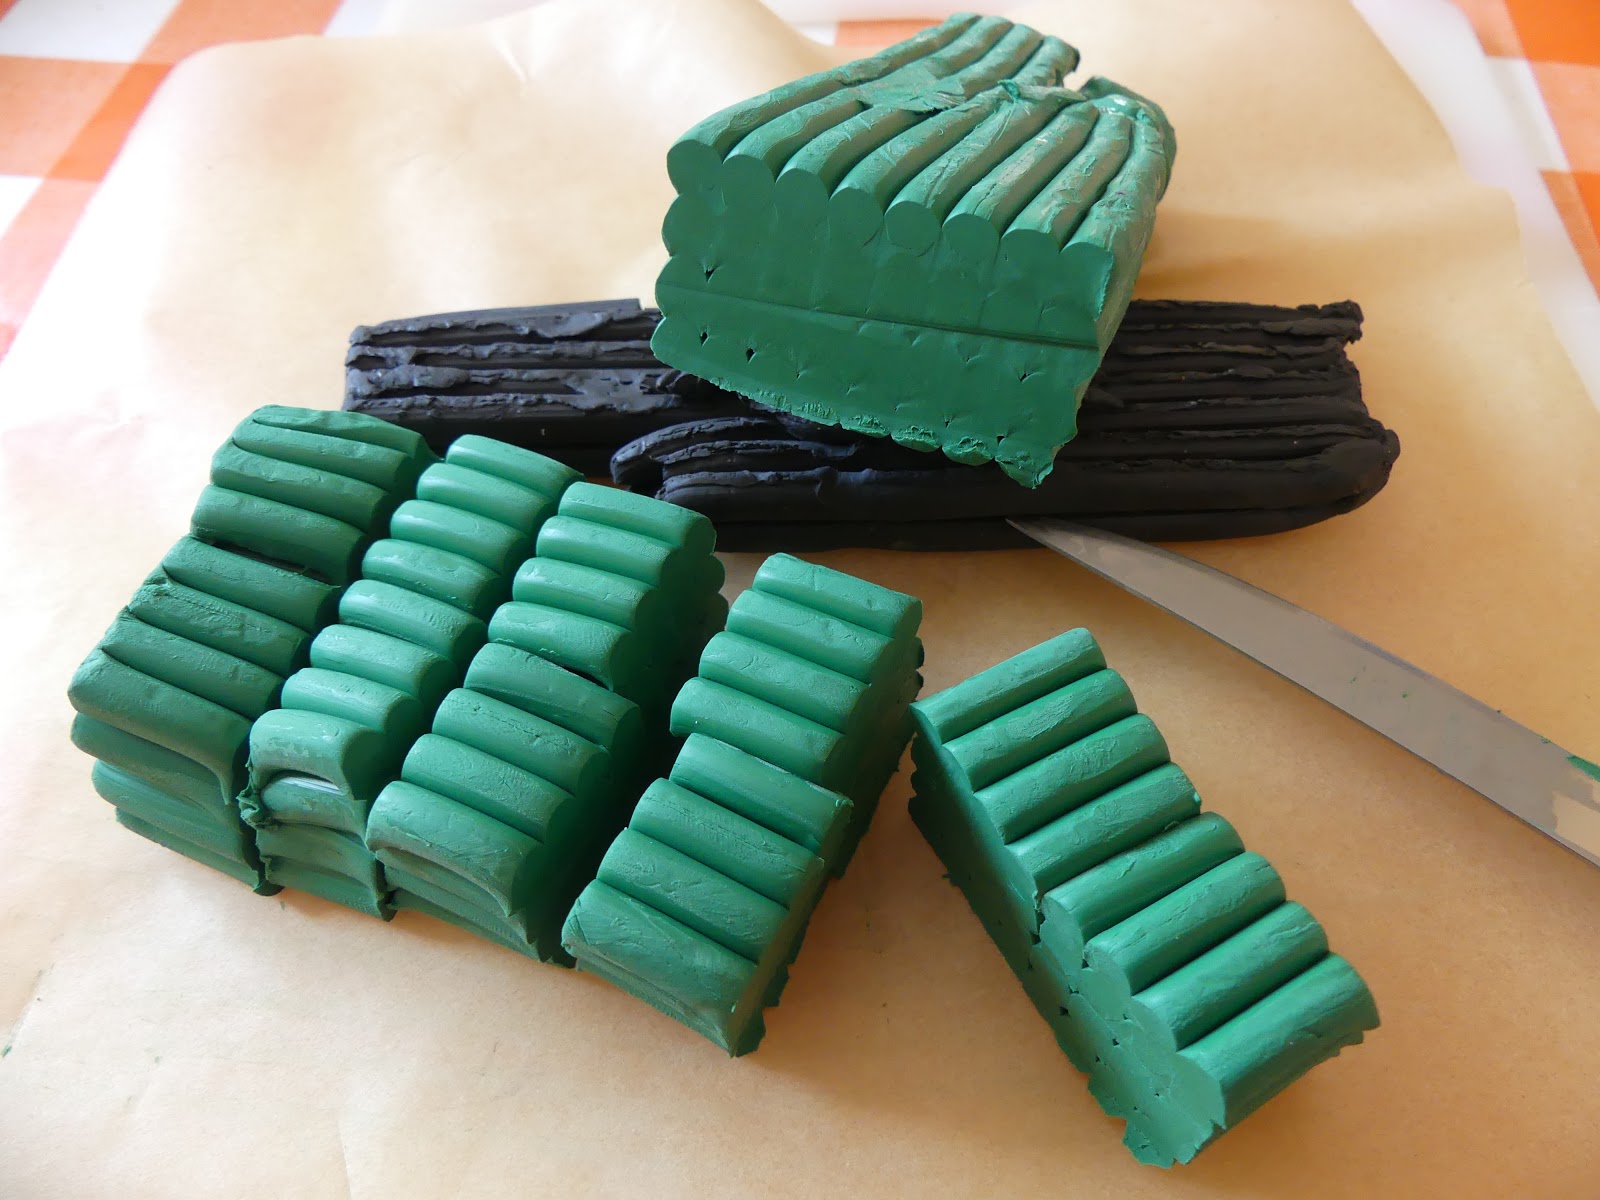
Purchase some Plasticine for the tip and some electrical tape for the fletchings and you've got all the kit you need to proceed.

Purchase some Plasticine for the tip and some electrical tape for the fletchings and you've got all the kit you need to proceed.


So we divided the cubs into four groups and explained what we were about to do both verbally and visually including the safety aspect of the evening i.e. not throwing projectiles unless told to.

I showed them a completed arrow and then talked a little about an atlatl launcher.

Then without further ado, it's out to the field to give them a demo.
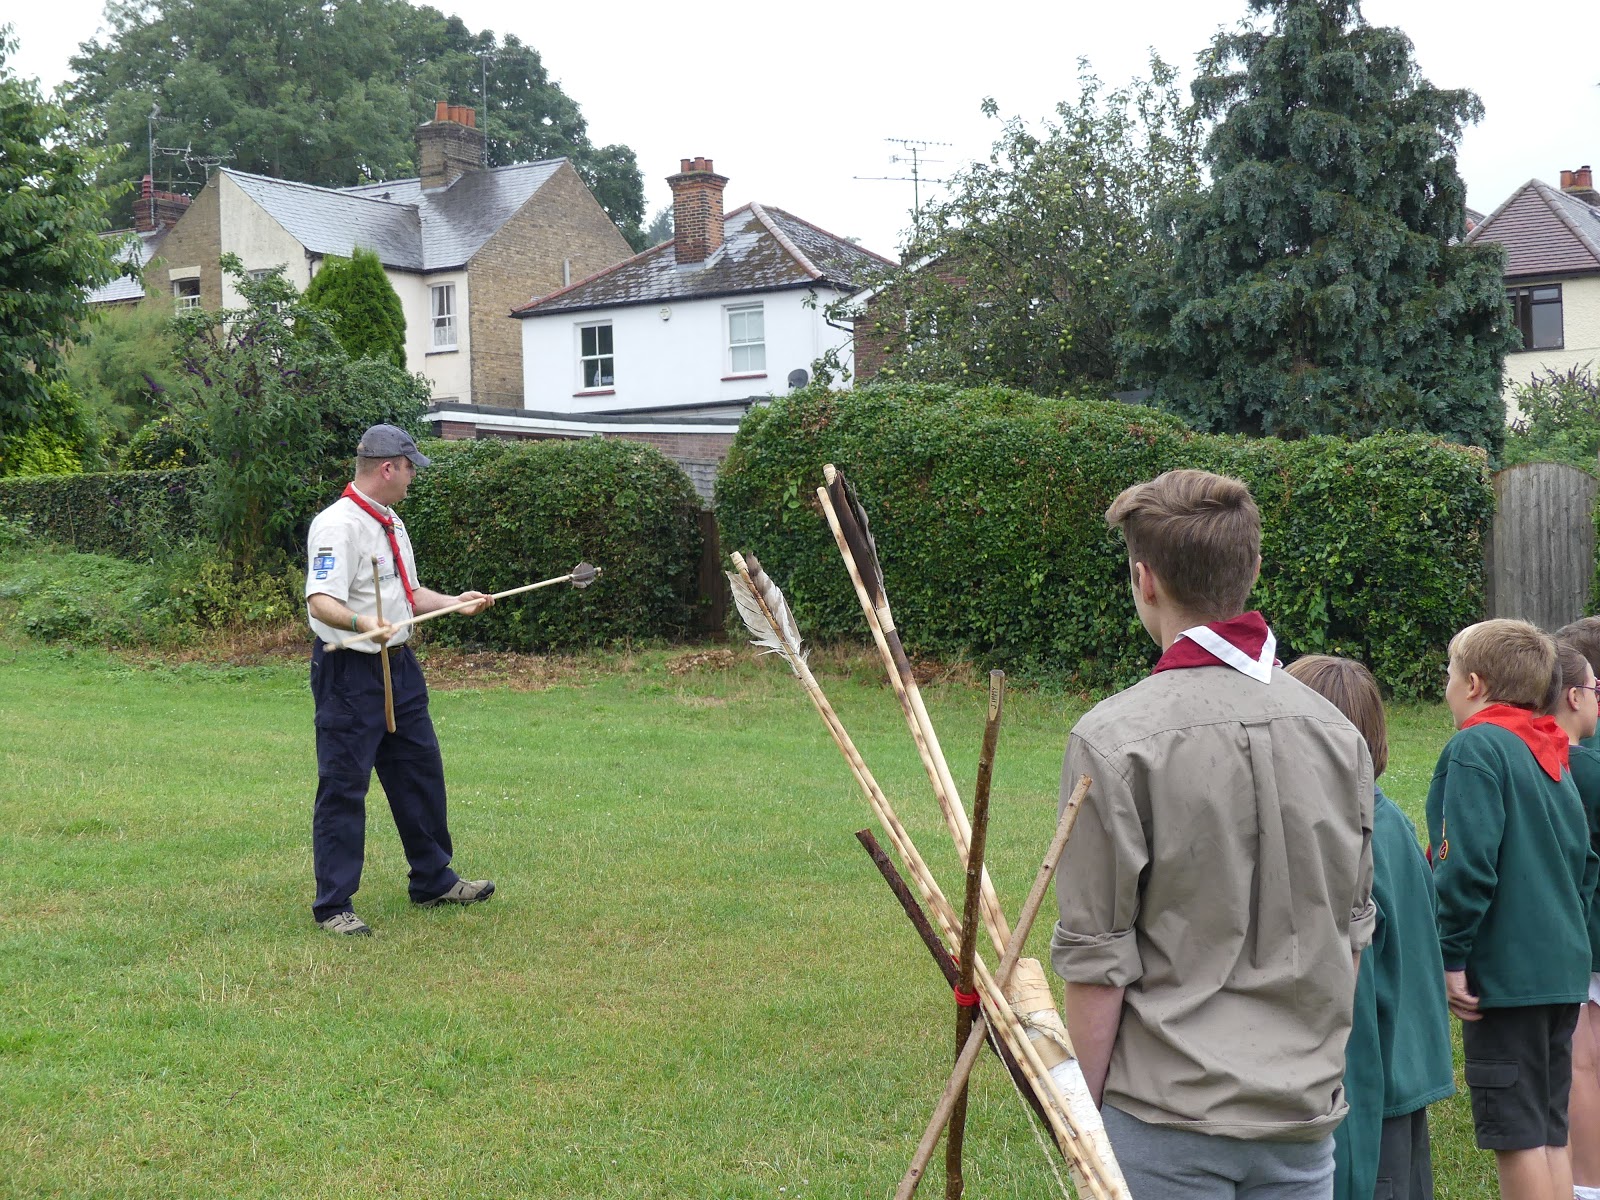
A quick talk about the sets and a demonstration with a promise of them having a go if we have time. I didn't show them how to launch a Dutch arrow at this stage as it prevents them doing so without my say so.

So with them enthused it was to the production tables and all hands on deck to help secure the fletchings first, which aren't at ninety degrees to the shaft but are taped flat to the wood, by taping the topes and then quills in opposite positions.
MAKE SURE THE FEATHERS ARE SECURED AT THE NOTCH END.
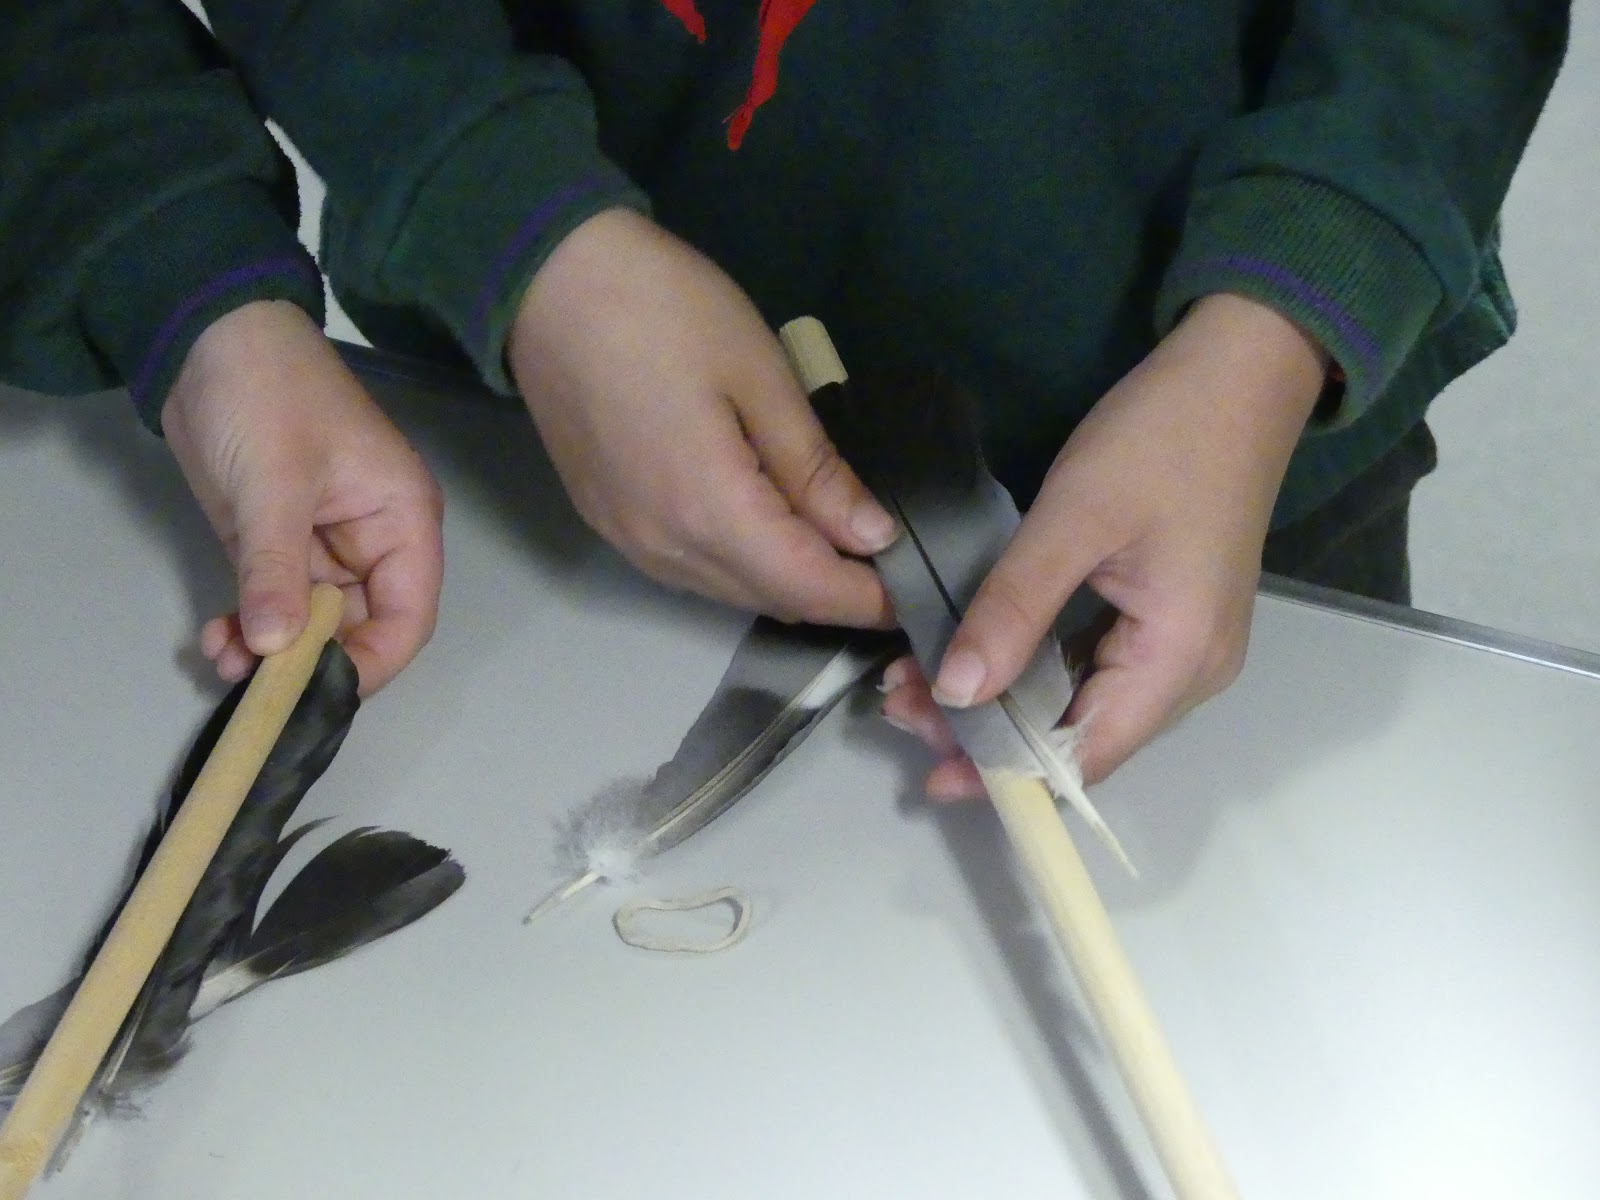

It is better if either leaders help or the Cubs buddy up to get the feathers on as straight as possible. The darts will still fly if they aren't straight but the aesthetics are better. Symmetrical feathers are straighter than asymmetrical ones which helps too.

Depending on time they look really good with a little felt tip embellishment but even if time is short get them to scribe their name on their Dutch arrow at the very least.


Add a small blob of pre-sized Plasticine to the tip and the dart is complete. Just for effect the one I demonstrated with was stained with fence protector and the Plasticine silvered up with Airfix model paint (I told them that I'd forged it that morning!). Hand out the paracord and get them to tie a stopper knot in one end.

We briefly stopped to spread them out for a picture on the HQ floor which looked rather good.

The method of launching the darts is shown in the above video (and the notch shape becomes clear) but suffice to say it is quite spectacular if you can get the cubs to launch in a fairly synchronised way. You will need several leaders as the Cubs mentally and indeed physically have trouble getting to grips with keeping the paracord taught.
We didn't have time to let them chuck the atlatl darts but they still had a great evening.
No comments:
Post a Comment