My Youtube 'how to' Video
When you have a camp fire and toasted food is the order of the day sometimes a sharpened stick simply won't do. A toasting fork is a fairly easy project to make out of a length of wire about 2-3 mm in diameter, something like a coat hanger an old fishing net or non-galvanised fencing wire (don't use galvanised metal is there is the chance it will give off zinc oxide fumes when heated . A detailed occupational health document on zinc oxide fumes can be found here).
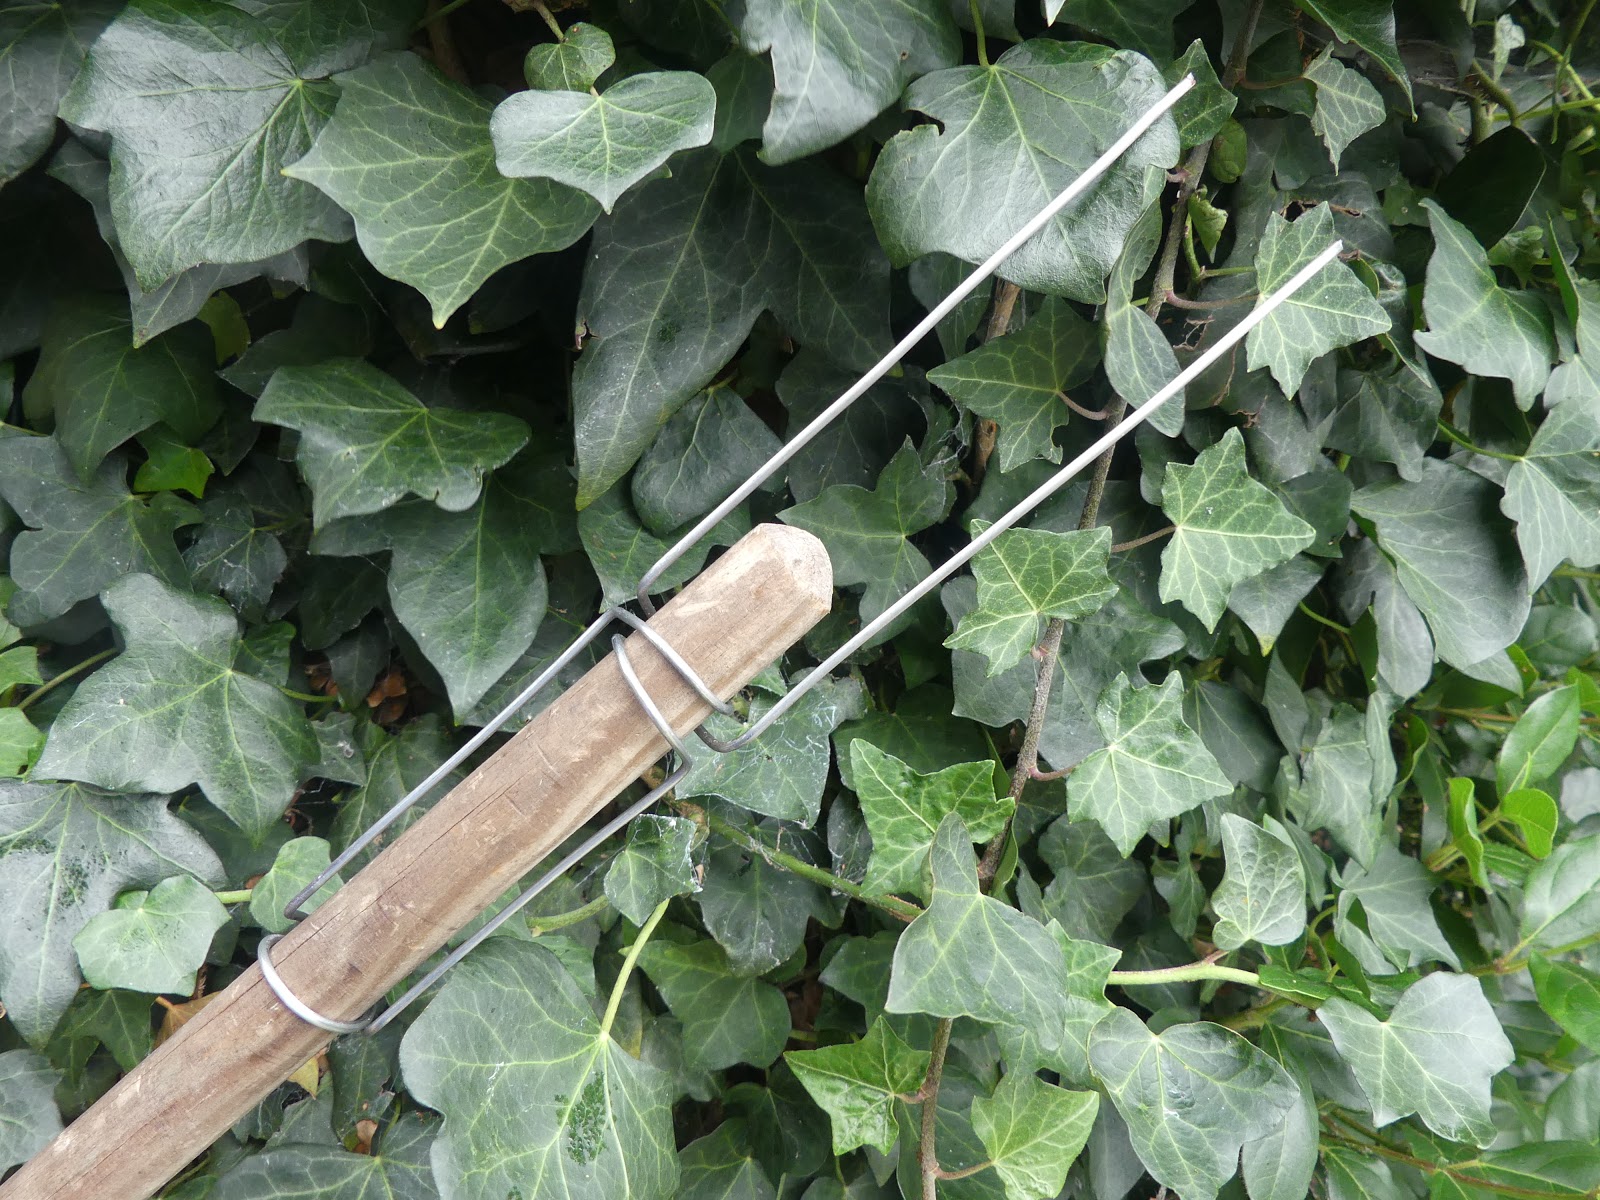
This fork is mounted on a suitably sized stick to keep your hand a safe distance from the embers. Did you know that a broomstick diameter is considered the standard stick size for the Official Toasting Fork Club's UK branch*?


 .
.


This fork is mounted on a suitably sized stick to keep your hand a safe distance from the embers. Did you know that a broomstick diameter is considered the standard stick size for the Official Toasting Fork Club's UK branch*?
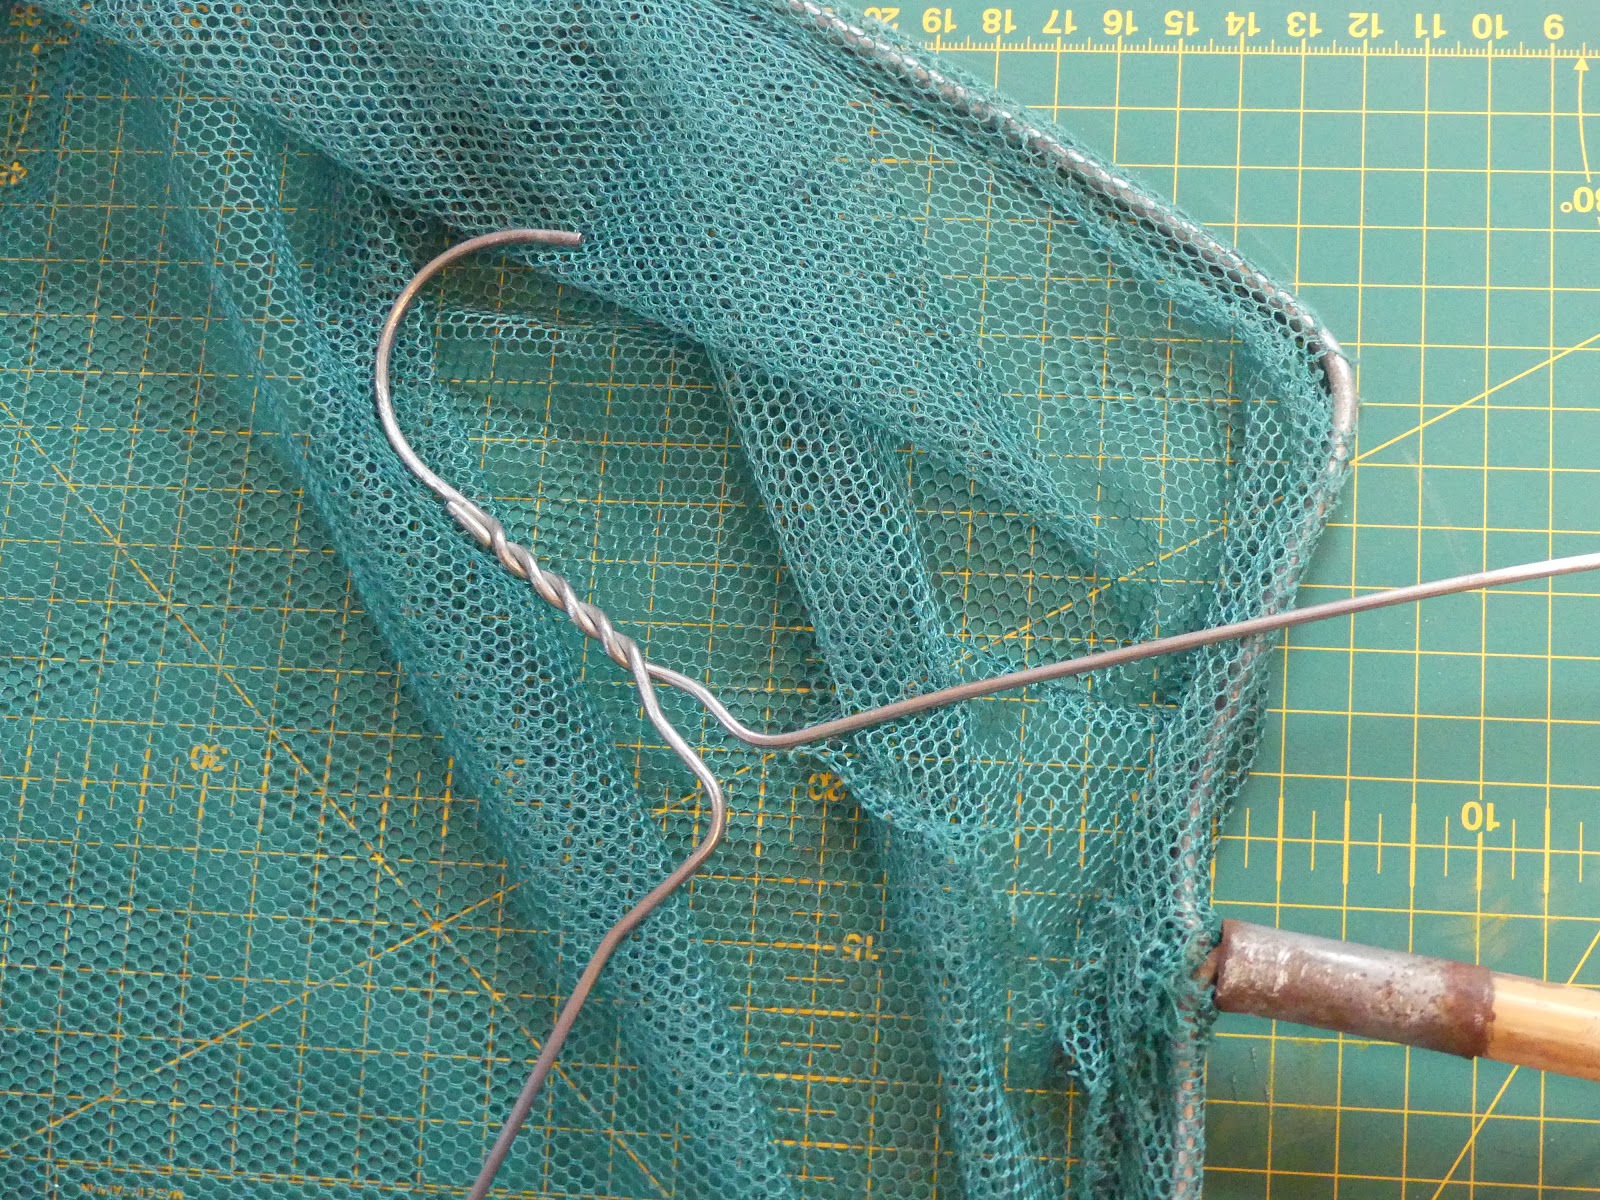
I've got my usual coat hanger with seconds to live, plus I thought I'd try with a slightly larger diameter fishing net too. I think it's safe to take it apart as I can't see my teenage kids wanting to fish with it any time soon. The tools tools you will need are pliers/ hacksaws and maybe a file to smooth off rough cut edges.

Coat hangers are fairly biddable so usually pliers and a broom handle will suffice but you could always use a small saw. Start by removing the coat hanger hook. an average coat hanger will give you about 84 cms or 33 inches in old money to play with which give you a small amount of trimmable excess if the 'prongs' on the finished fork need evening up

Once de-hooked give the metal a rudimentary straighten with your hands.
 .
.
Then, using pliers, refine the straightening.

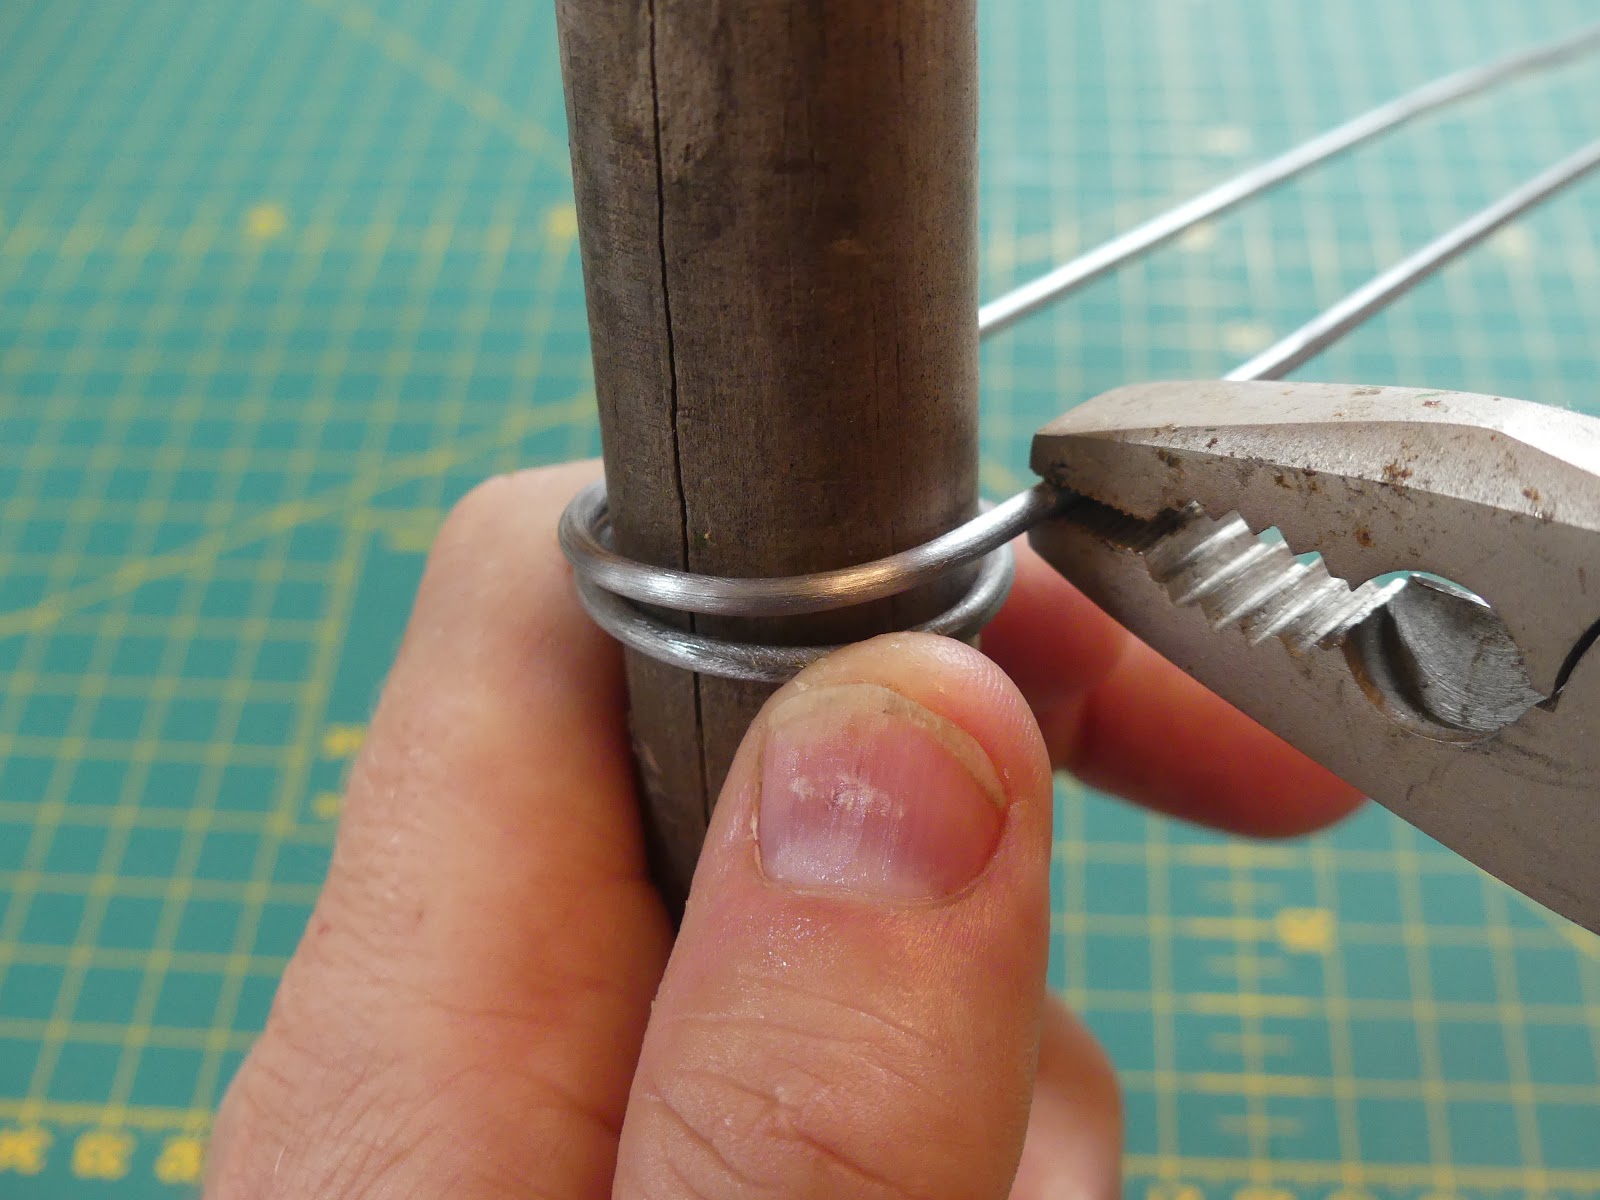
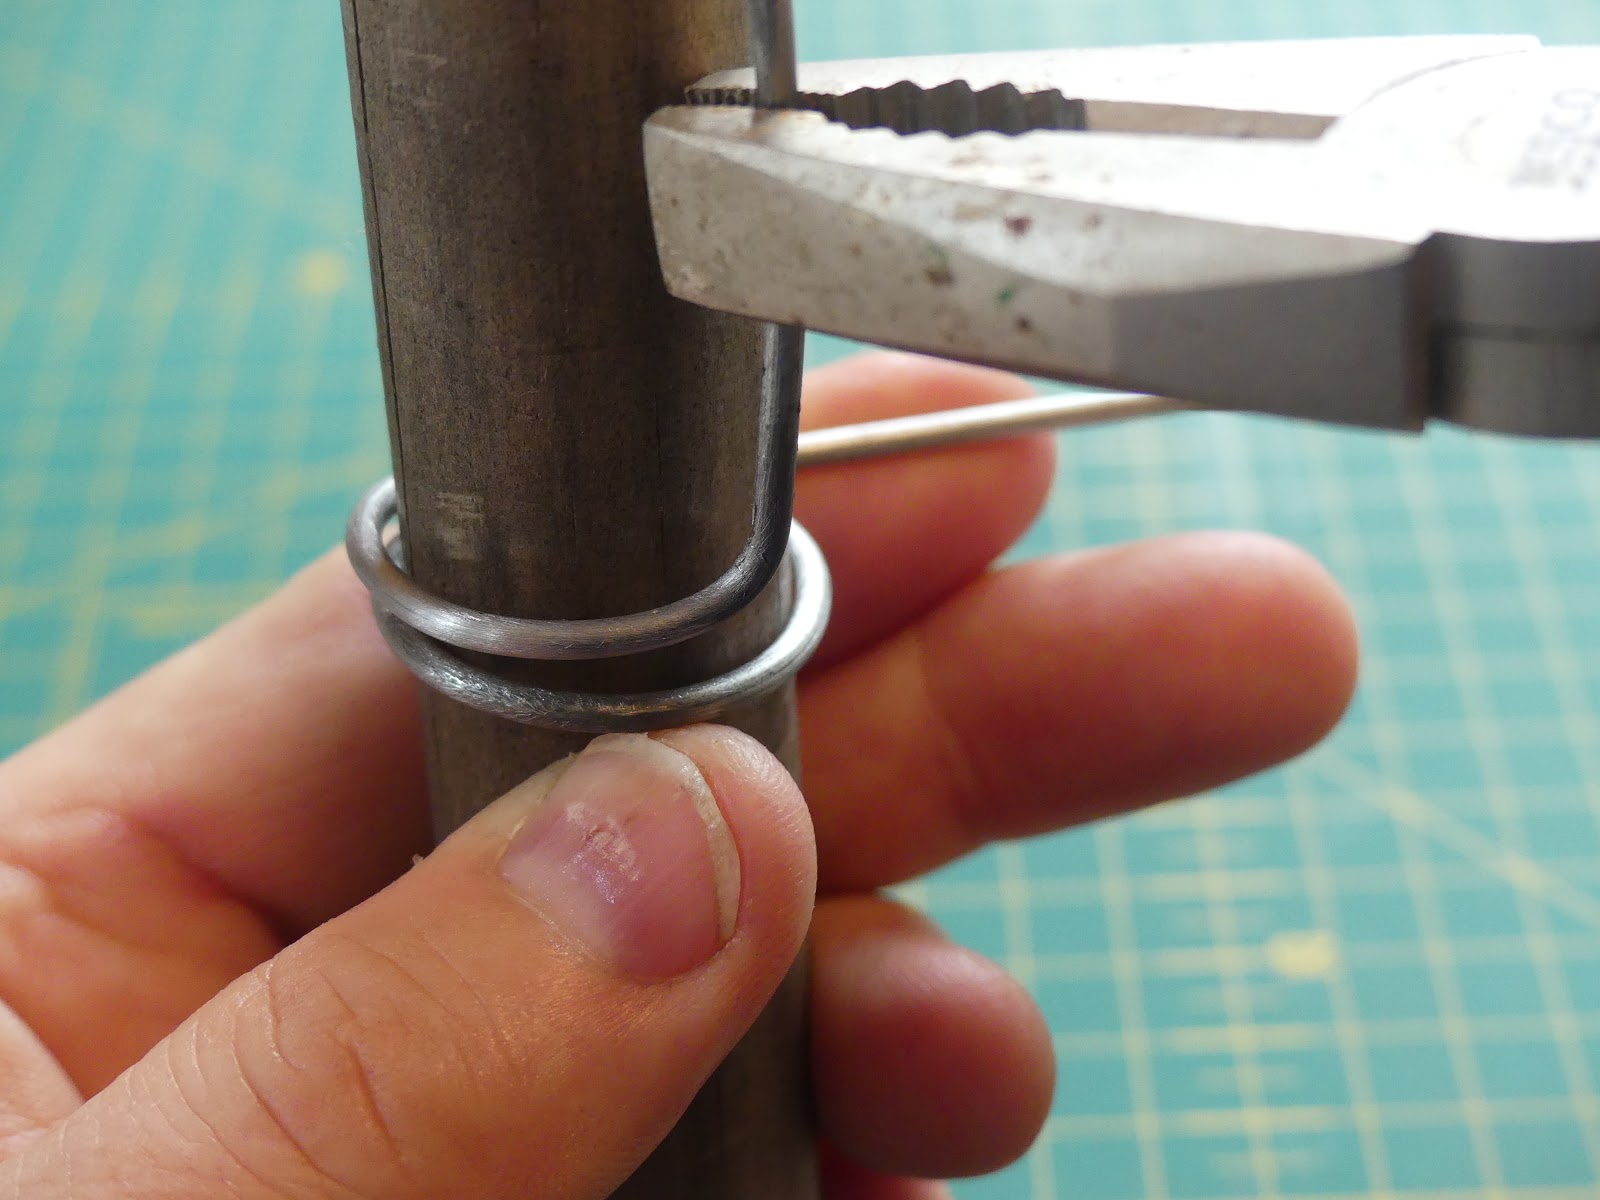
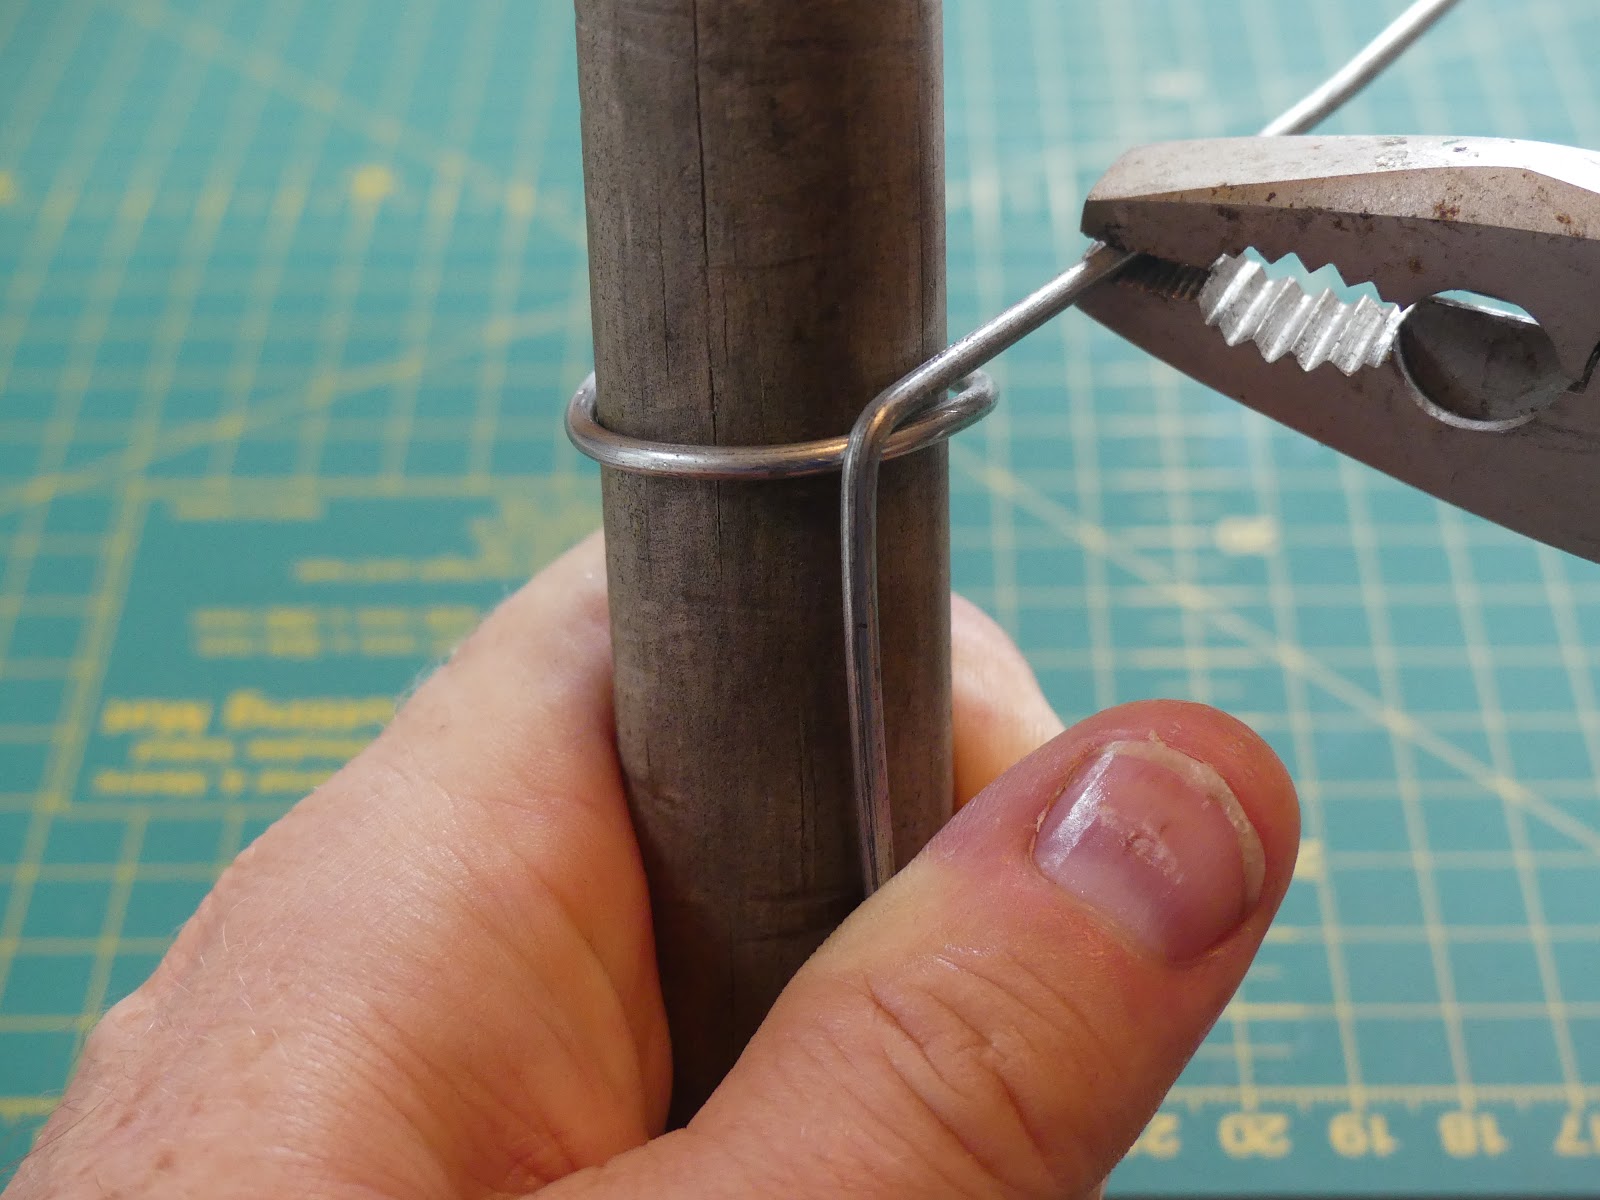
Find the centre and then, using your broom pole twist the metal as shown, initially using pliers until it forms a fairly snug circle. I've got this pole propped up against the side of a table with it secured between my knees.

Then carefully bend the lengths through another 90 degrees as shown.
Pliers time again. Start bending one of the lengths into an upright position
Try and keep the start of the bend as central as you can but equally it's not a problem if it isn't mathematically spot on.
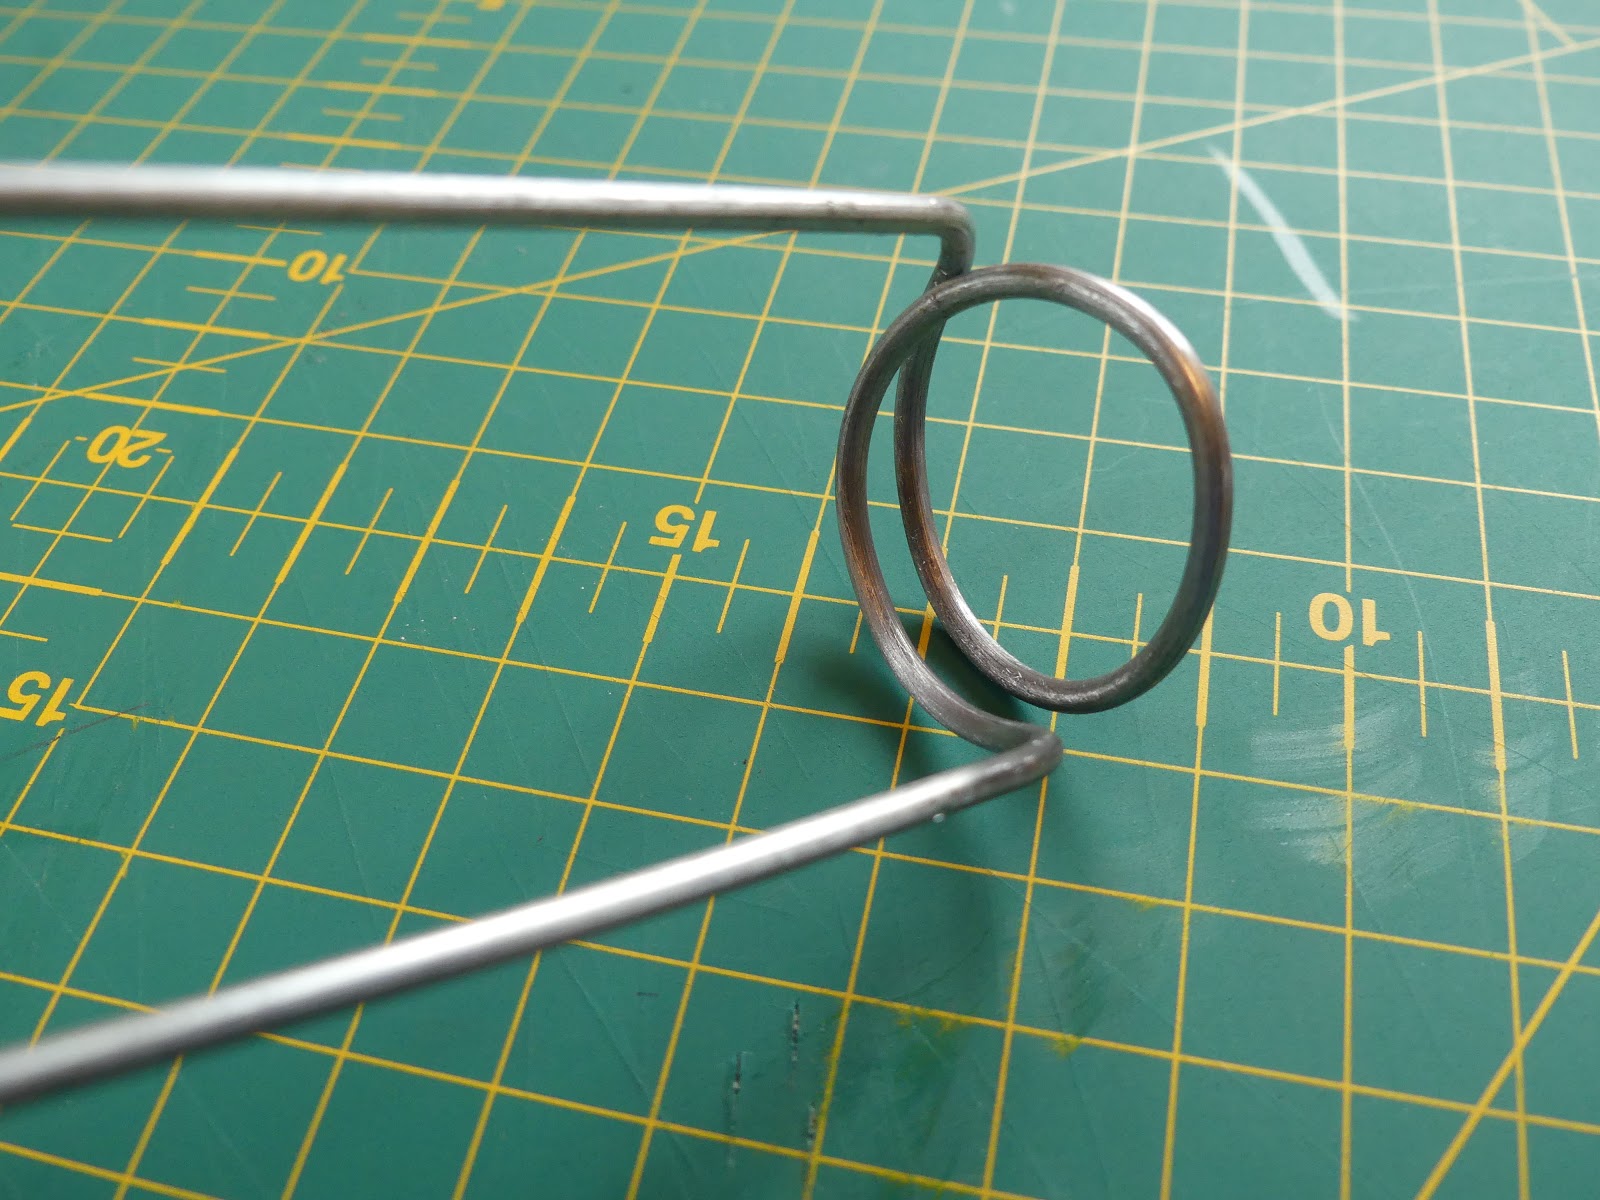
You should then have a metal structure not unlike this for your efforts. It is a project that will need the odd tweak as you go along, so after getting to this stage I gave the two lengths a quick re-shaping to make them more parallel.

The next stage ruins the landscape series of pictures but is necessary to show what happens next clearly. Bend the long length about four or five inches or so up from the first series of bends as shown.

Then form another circle similar to the first one. This is a little more fiddly because you have to work round the other length of metal.

You'll end up with something like this.

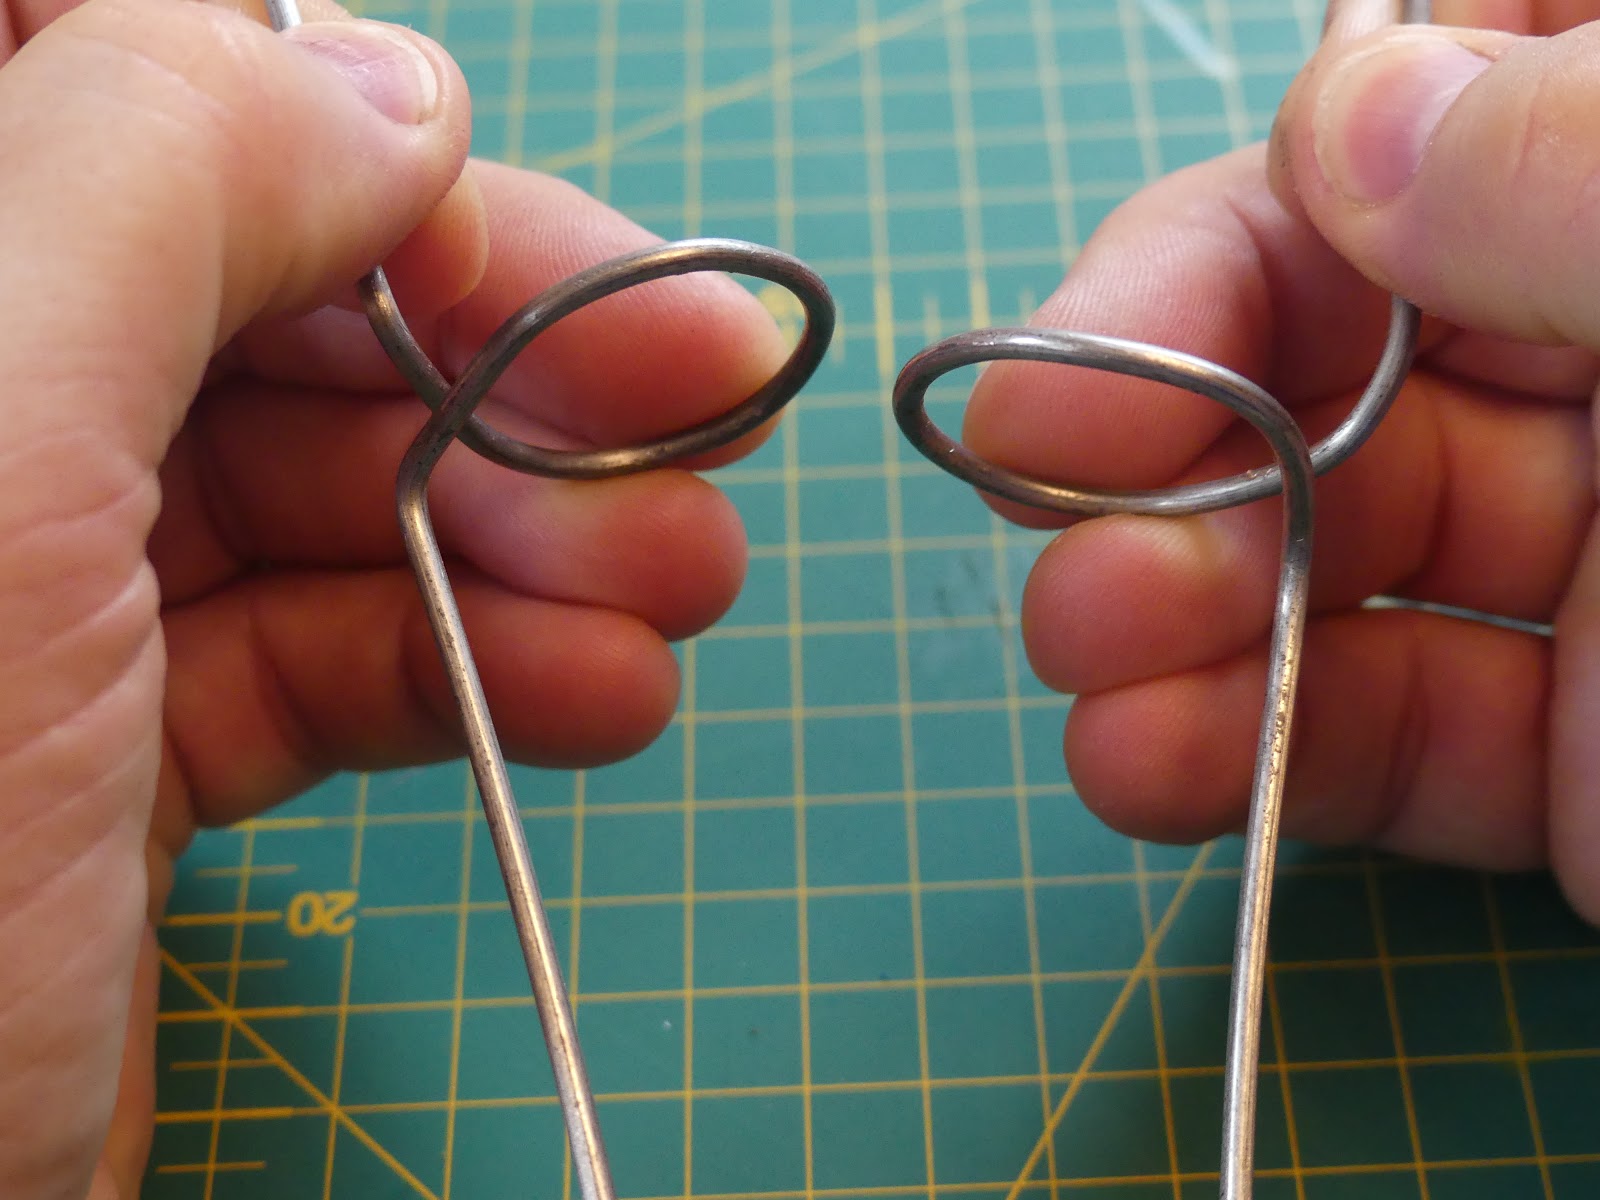
And then finally bend the length through 90 degrees, this forms the first 'prong'.
Nearly there. The other length needs forming but around the other way so in this case the second one will go anticlockwise. try and keep the bends close to the first circle of metal but again it's not super critical.

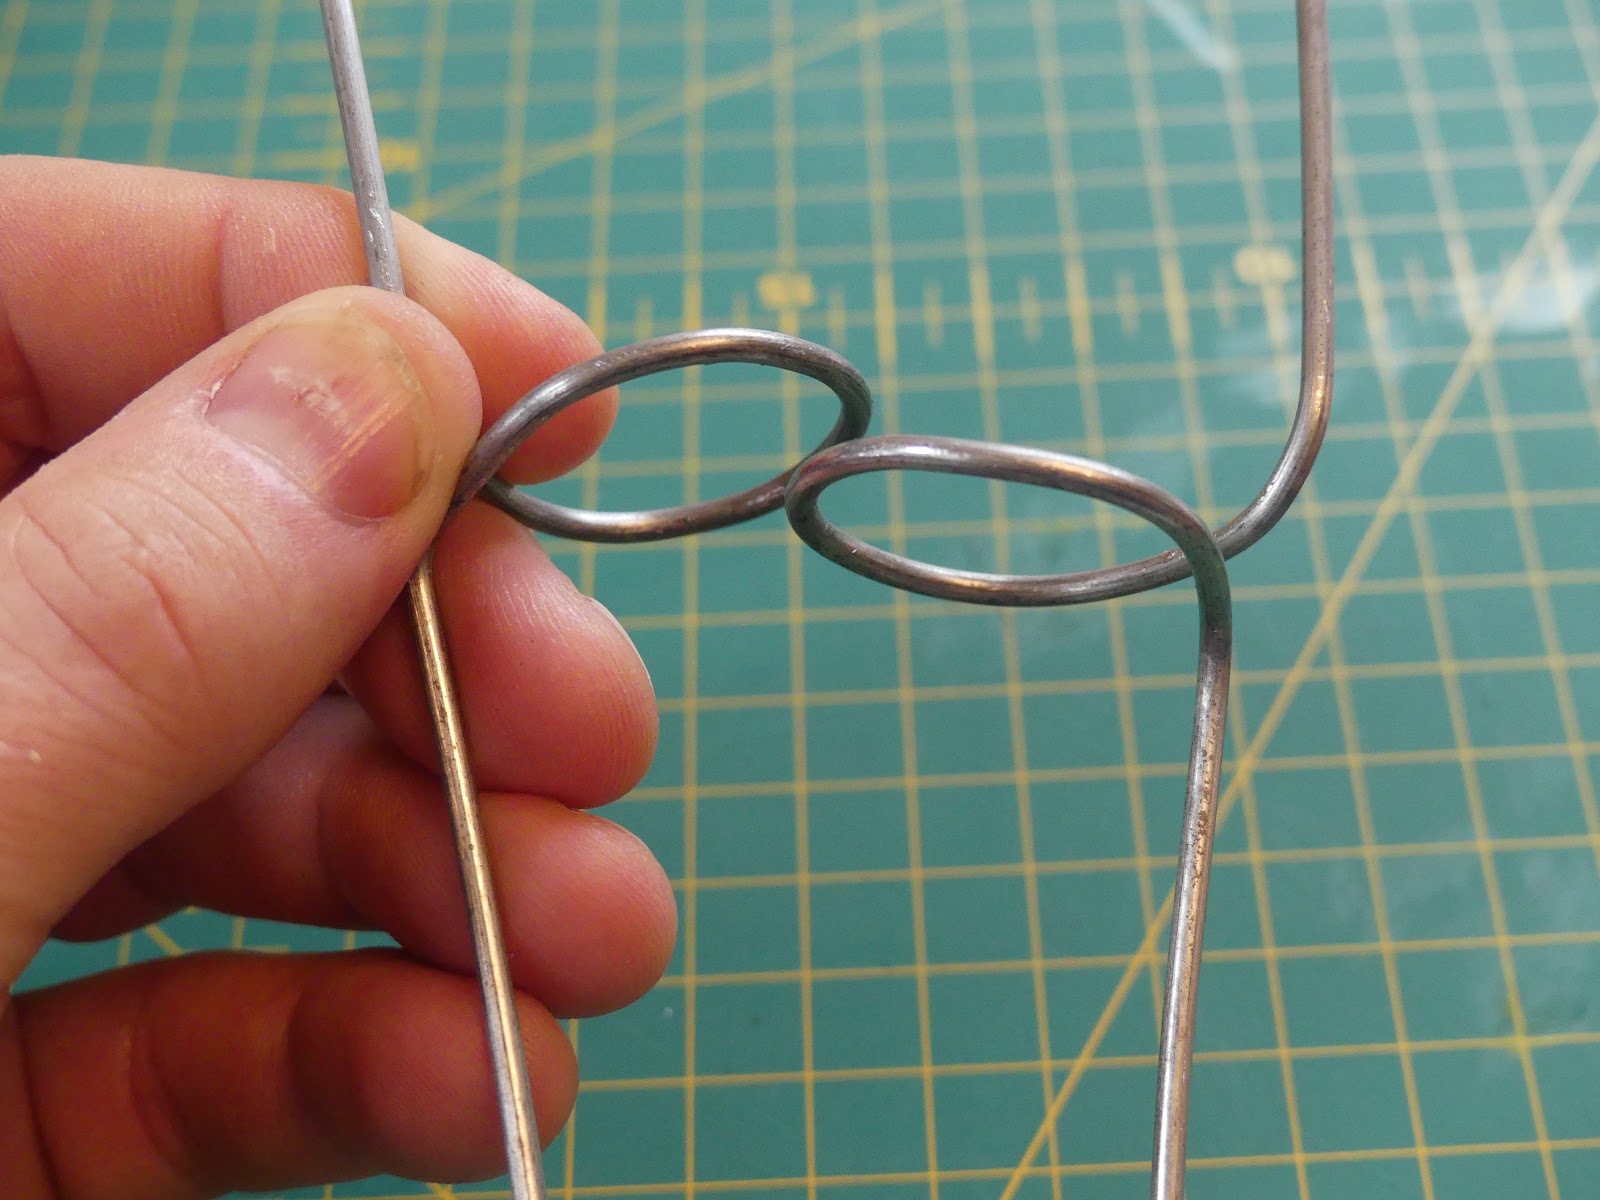
This is a close up view of the structure.
To make it fit on a length of wood you need to bend the structure apart slightly.
The idea is that when they come together they'll be trying to adopt this position and therefore grip the wood.

Use a pair of pliers or a junior hacksaw to even up the ends of the 'prongs'.
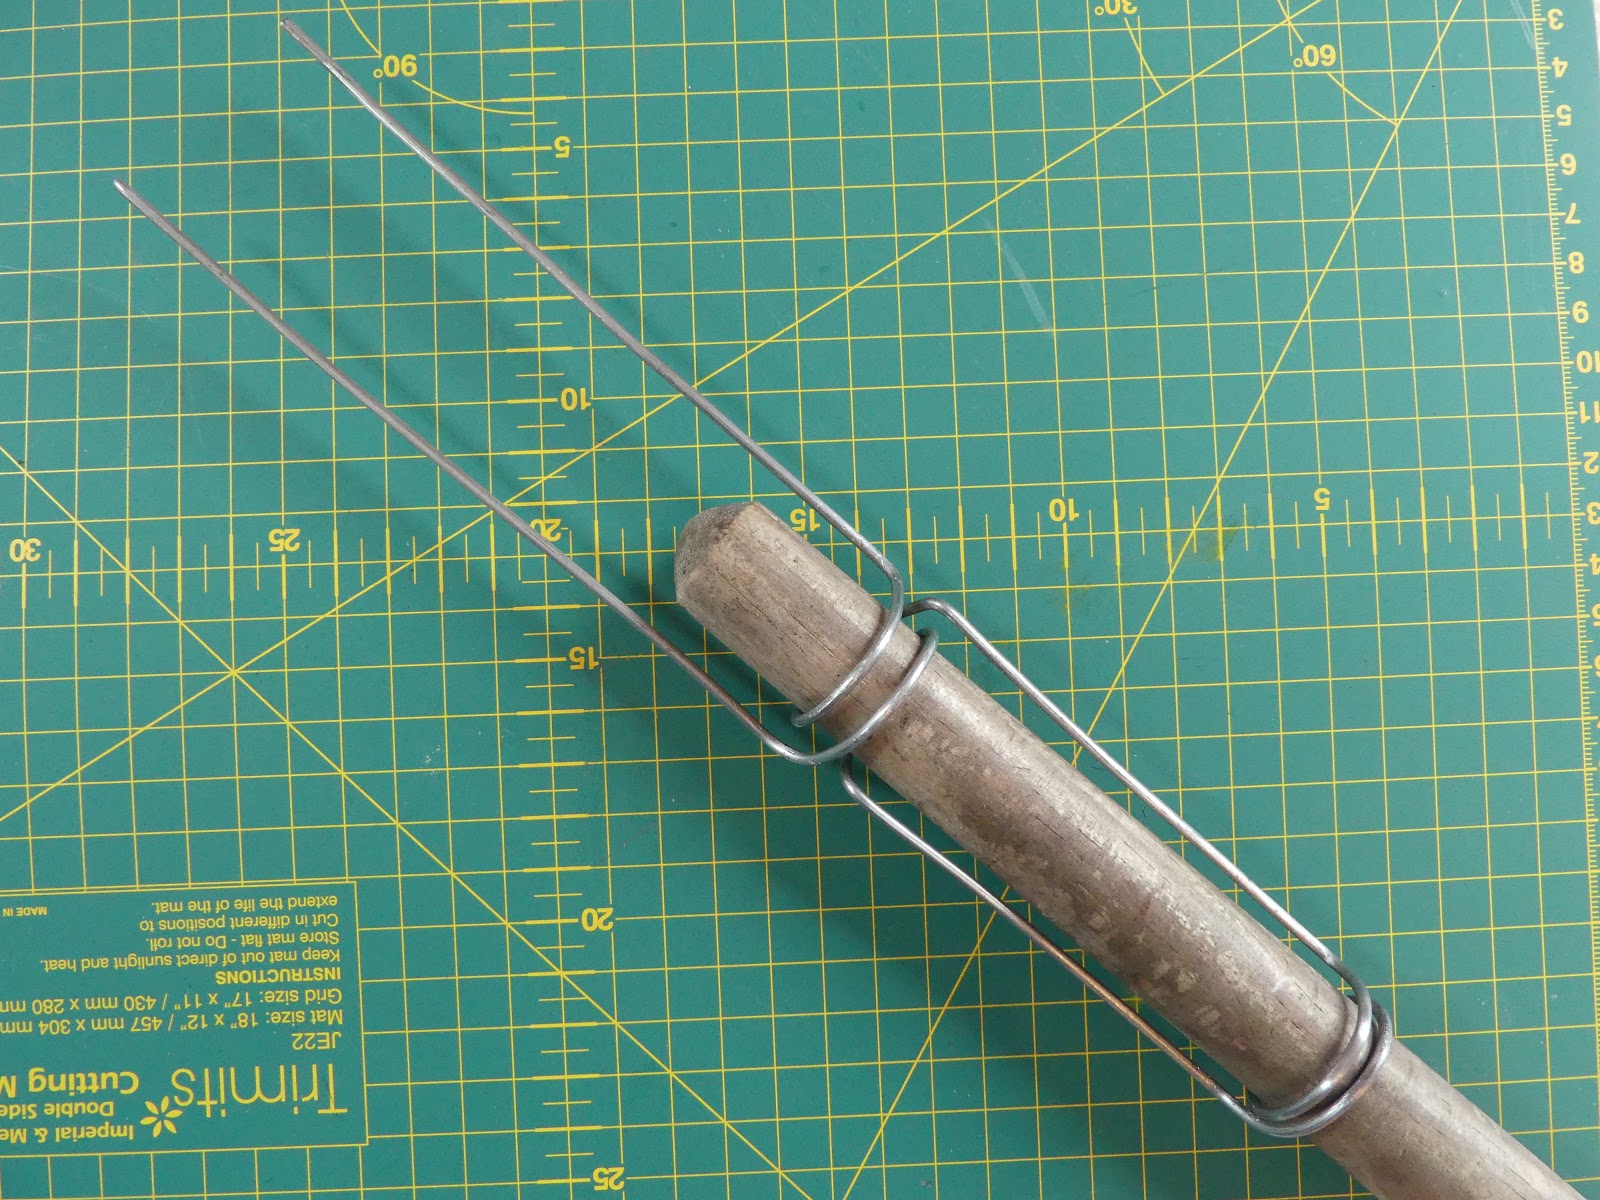

Finished and mounted and the 'prongs' safely stowed in a drilled out cork.
I've left this one deliberately long because I see a use for this one at Cubs when they moan that the fire is too hot to hold a marshmallow near. This bad boy will hold 8 or 10 in safety.

It is also great for buttered and sugared toast which brings back fond memories of Scout camps...It goes without saying that hot sugar is like oral napalm. If the fork can be mounted at a shallow angle it is good for draping bacon over and I'm currently pondering if it would be possible, with the addition of a couple of looped pins, to us it for ponnaced trout.
*Absolutely not true.
3.
No comments:
Post a Comment