My You Tube 'how to' Salmon Skin Leather video
I had been doing some casual research into making fish skin leather for a little while but a Bushcraft and Survival Skills magazine article by Naomi Walmsley gave my the push to start in an unusual way.
When I undertake a new bushcraft discipline I triage the projects so if for instance a sunny day was required a certain project may go to the top of the list. Now I'd recently got some willow so as I pondered how to use it a picture Naomi had used made of a Salmon with the skin half off me realised that I was good to go on this on my first attempt.
I work in food retail that has a Sushi concession and they get through legendary amounts of salmon meat. The fish come in with the head and innards removed and are absolute Leviathans and the guy who preps them was only too happy to save me some of the otherwise binned skins.
They prep the meat in a different way to a fish counter which essentially sells steaks and fillets. They want thin trimmed slices to fit inside rolled sushi which necessitates an inch or so being cut off each side lengthways so the ones I get would be even wider but for this. The longest I've had was about three feet in length but easily they are two feet plus. This is how I do them and have added a Youtube video at the end.
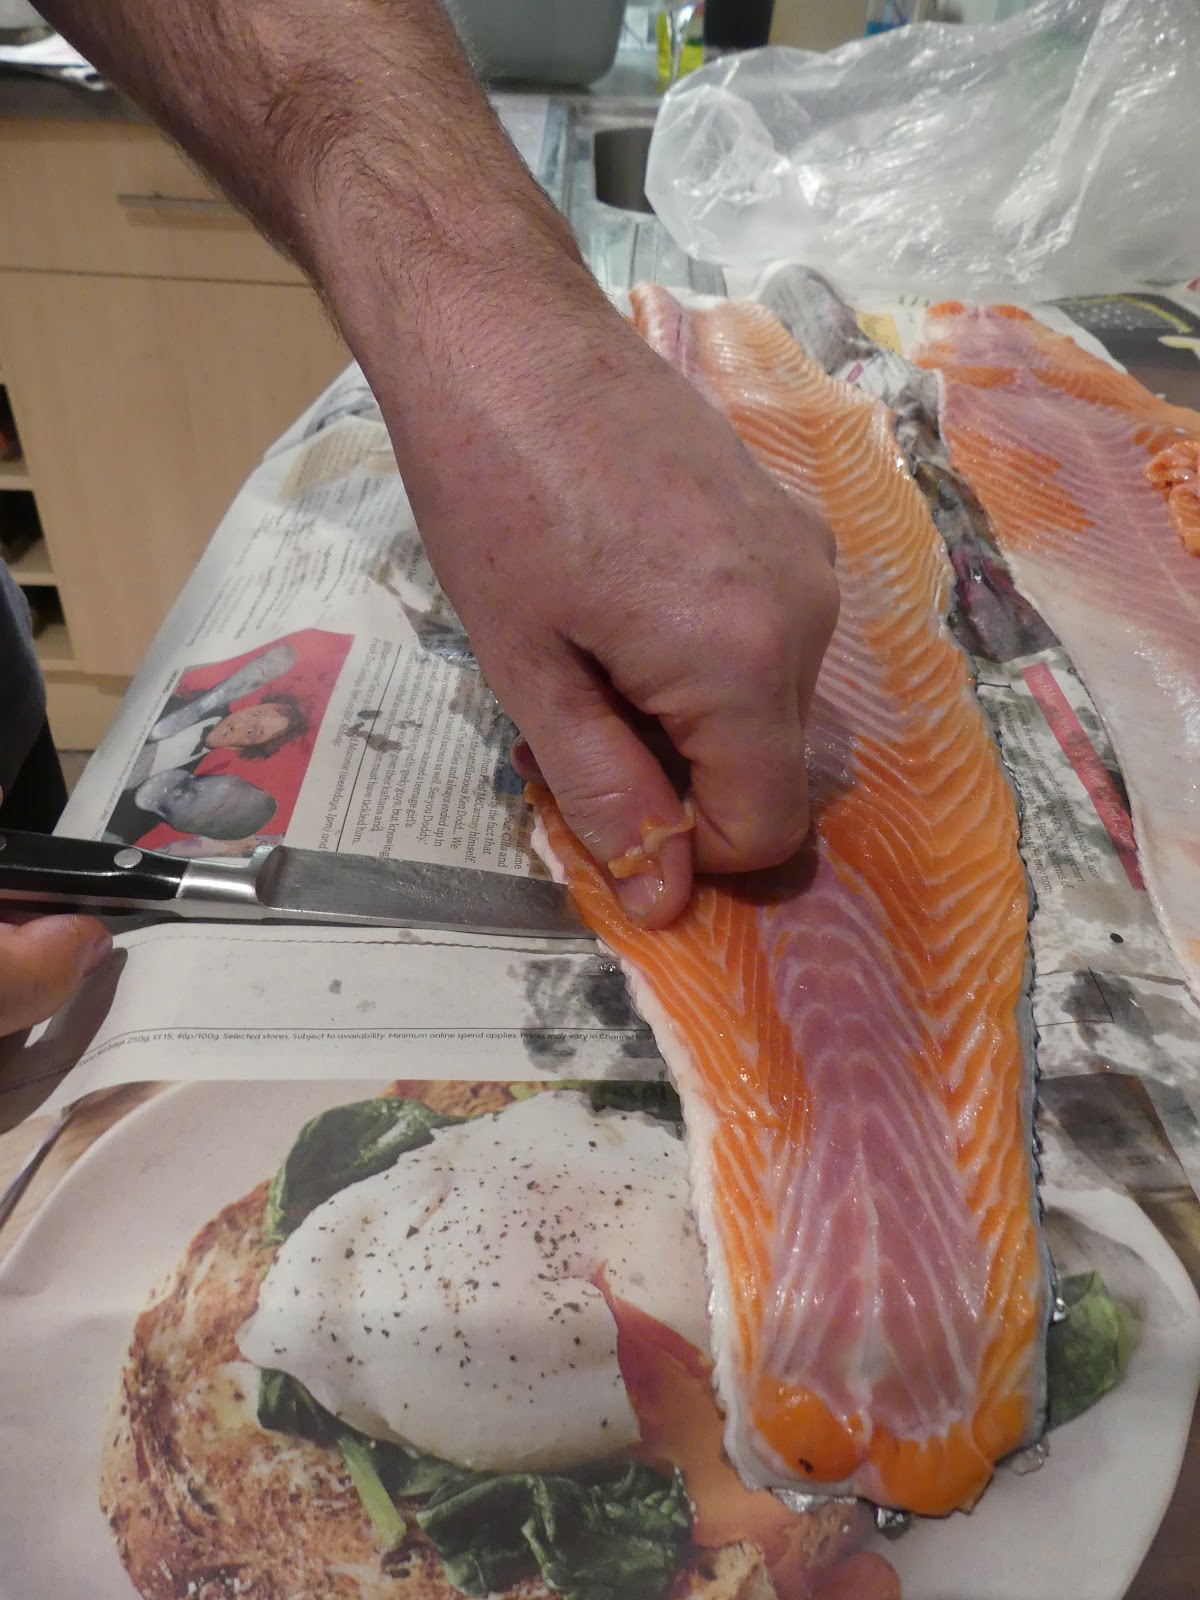
As they big sizes you won't get the remaining meat off in one go so may need to slice bits off in sections. There is a fair bit of meat left but a lot of it is the strong tasting brown meat along the lateral line and even the pink stuff had a fair bit of fatty and connective tissue attached so I don't save any.
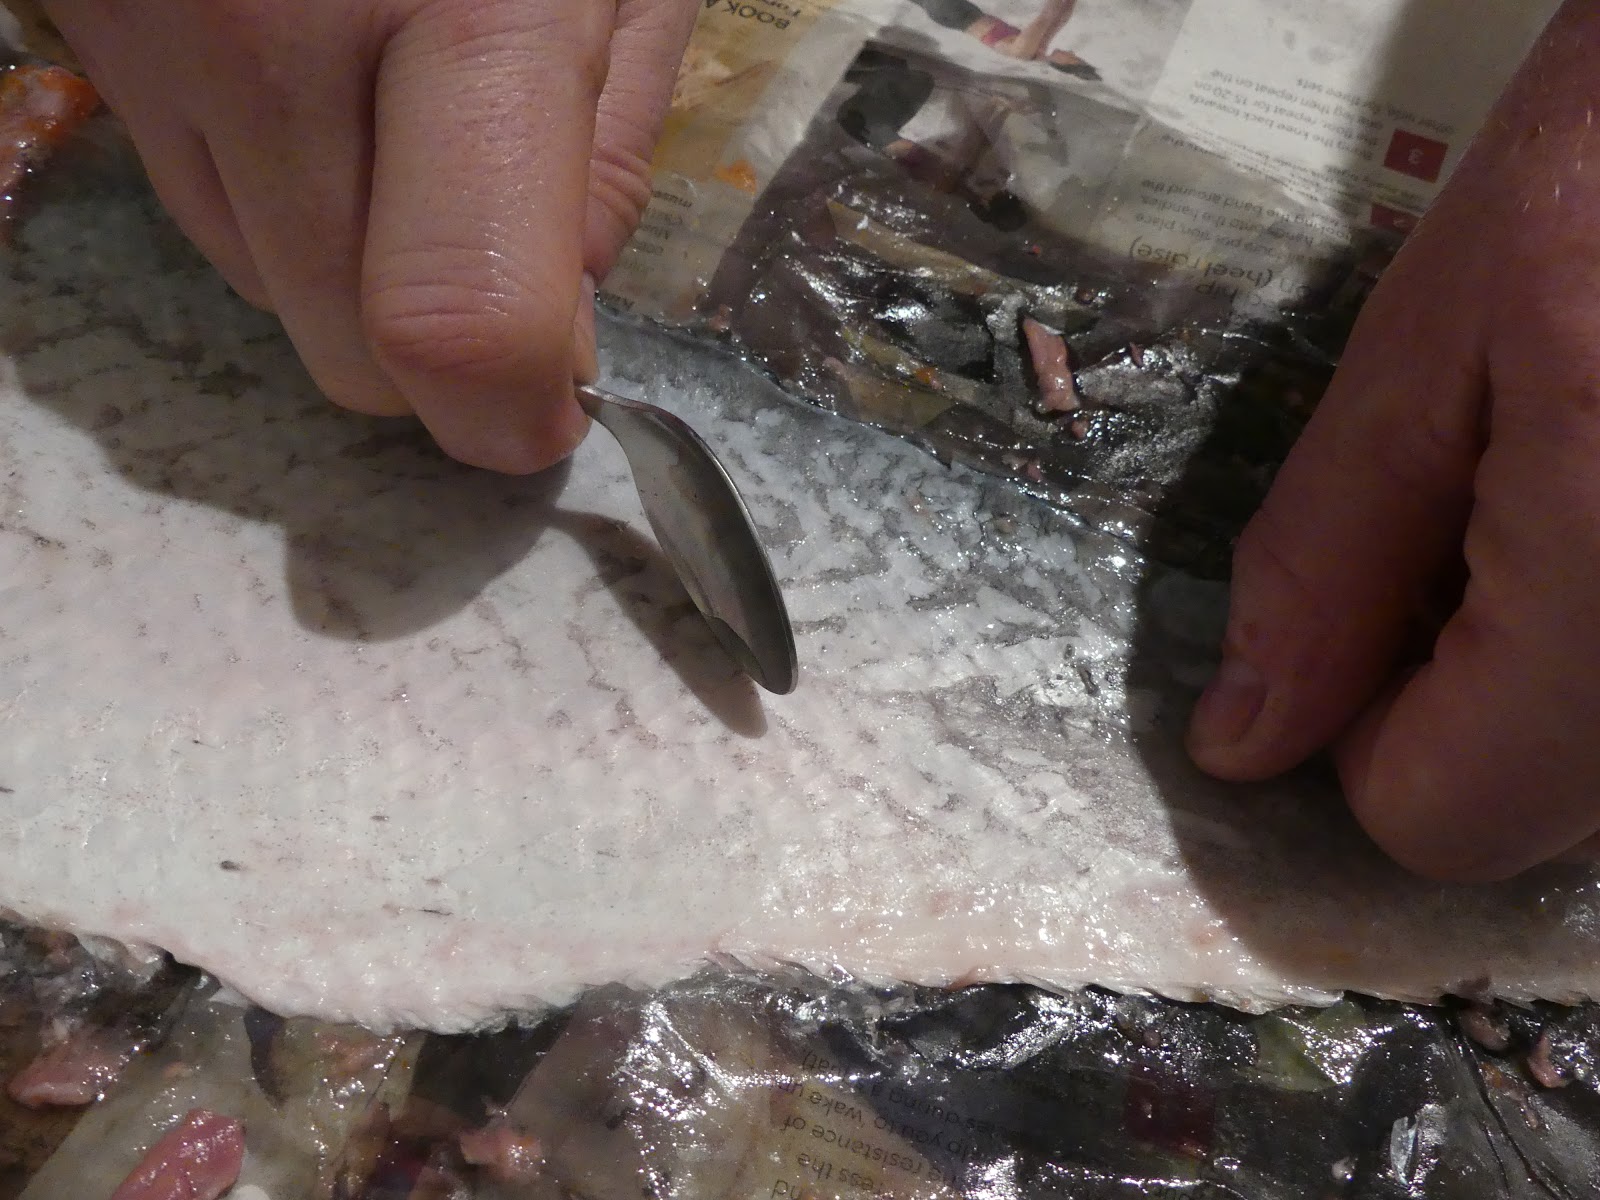

After removing the majority of meat I then use a combination of a teaspoon and sharp knife blade held at ninety degrees to scrape the remaining tissue off whilst holding one end for tautness.

This is the meat side scraped to within an inch of it's life on the meat side.


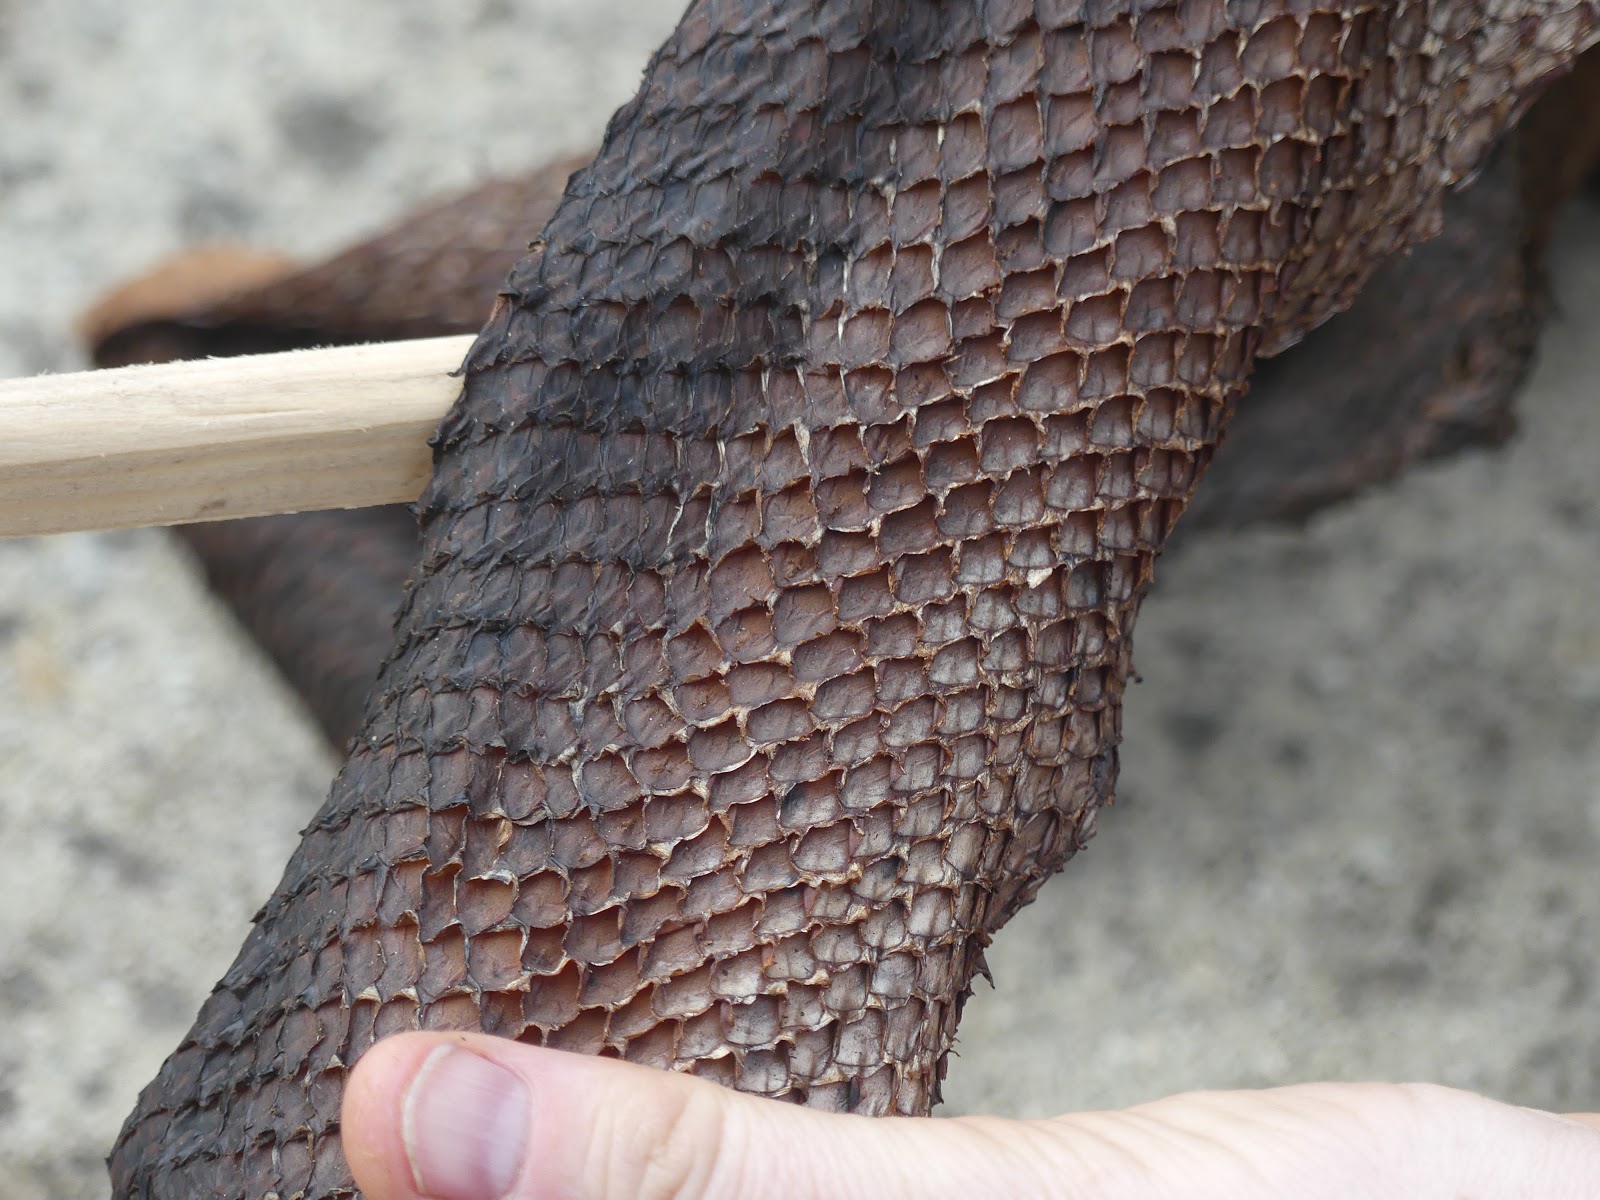
Flipping the skin over I then set about de-scaling it. You probably don't need me to tell you that scales can go everywhere so I put plenty of paper around it and again, used a sharp knife blade held at ninety degrees and dragged it from tail to head.
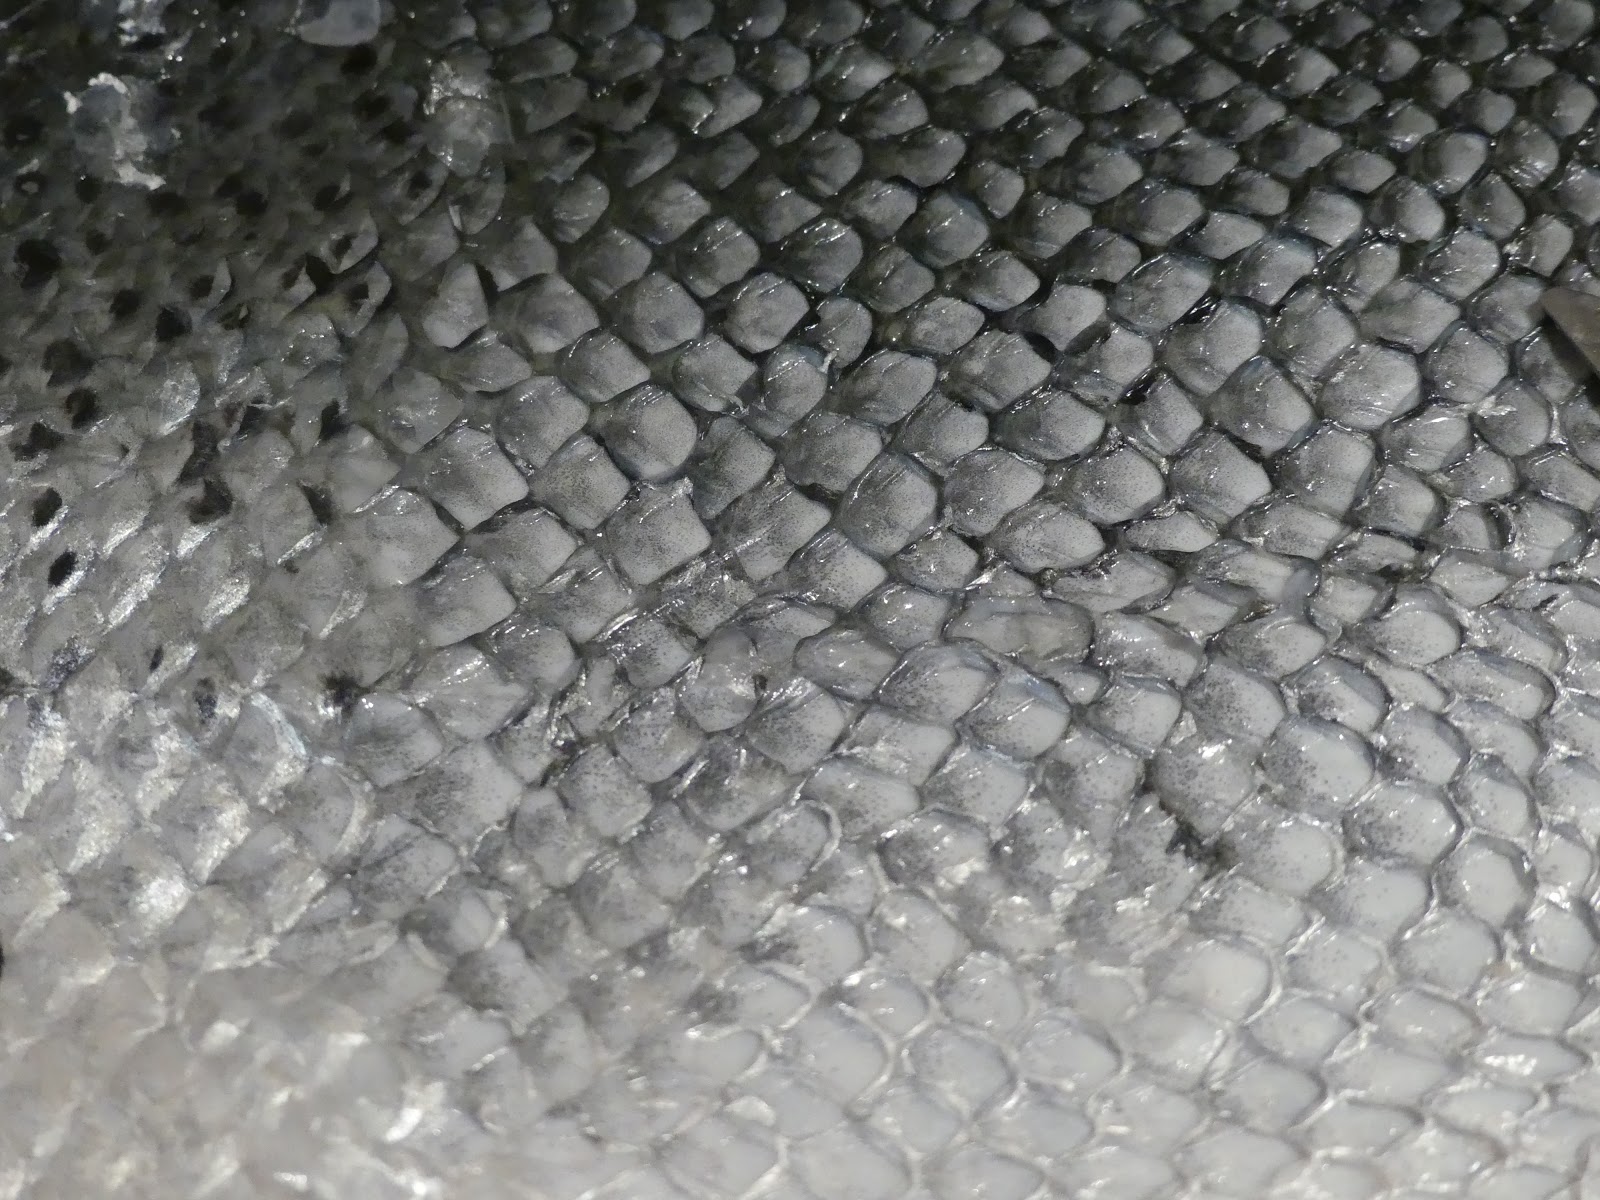
The shape left behind is an attractive diamond shape. I find particular attention is needed with the scales along the lateral line which were often harder to remove.


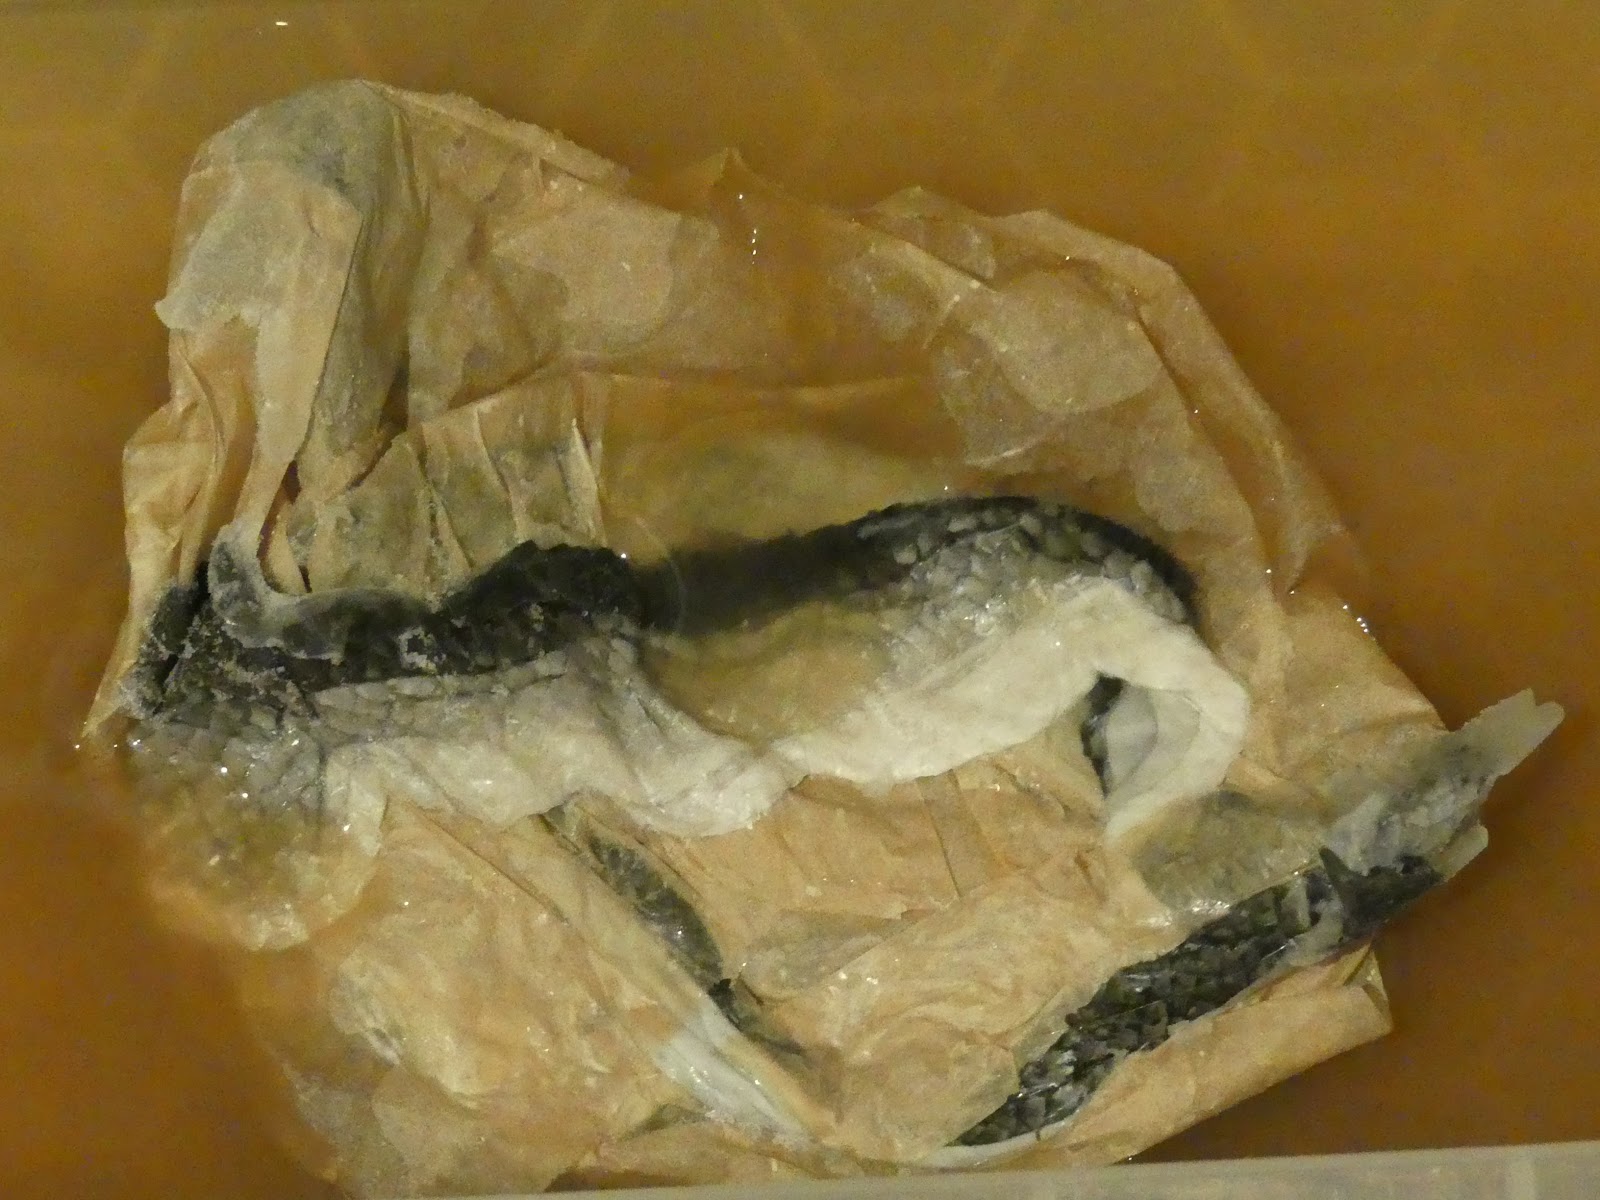
In the past I have used egg yolks/ oil/ washing up liquid mixes to soften the skins after cleaning them in a washing up liquid solution (above left). I have also put a couple of dessert spoons of washing up liquid in batches too but tended to just go for oil and egg. Latterly I have used egg yolks alone (above right, going up to two per side) I have got hold of salmon heads from work before but found little brain so hence egg yolk used instead of grey matter in the softening/ cleaning mix.

One bonus of using copious egg yolks is that you have whites left over for a large meringue!


And whilst the skins were chilled overnight in the mix it was time to make the tannin solution. This was mainly made up of Oak and Willow bark with a hint of Silver Birch and Sweet Chestnut...And around 18 used teabags that I stored in the freezer until needed, I figured that the remaining tannin in the spent bags was worth accessing and was a free resource. I leave this chopped up mix come to the boil and then slowly bubble away gently until it is the colour of thick gravy. To access even more tannin chop the pieces as fine as possible.


I'd read that tanners used to try the solution to gauge whether the tannin level was sufficient and I thought 'Why not?' As all the barks I ever use are non-toxic. A small sip will practically turned my mouth inside out (think a stewed cup of black tea times a thousand). If it does it's good to go as far I as was concerned. I had four pint milk bottles to store the solution in which I put in with a funnel lined with kitchen.


I start off with a 7:2 soft water to tannin mix (hard water can apparently mark the skin with lighter coloured mineral deposits). I've noticed the spoons I stir it with are often slightly stained and I've experimented in the past with trying to stain some of my Lime bast cordage and a bit of old settee leather in to see what colour both held. The leather, almost predictably, was stained on the rough side but the Lime? Well, the jury is out.

And so after a couple of days of the washed skins soaking in a weak solution there should be a clear uptake of tannin. The weaker solution is started with becasue a full blooded solution from the off will apparently case harden the skin which means the outside will tan and not allow penetration to the inner parts.

I've also made a jig out of wood scraps from my wood steamer project to start stretching the skin. I sanded the thin wood to a point with one half being a shallow point and the other a little steeper depending what I need to be doing to the skin.

I begin to start working the skin on the jig from when it went in to the weak solution applying some effort length ways, sideways and across both diagonals. I add some stronger solution to the original after three days at a ratio of 5:2. By this stage there isn't a fishy smell of course, more wet leaves with a small hint of wet dog.

Again during the second immersion I squeezed out the skins and gave them a working on the shallow jig angle. I tried to do the skin the opposite way on the length day to day because I found that I was gripping it harder under my fingers towards the top and this meant that the bottom half of the width wasn't worked as hard.

And then three days later I remove the weaker solution and add the neat stuff. You can see from this image the rich colour of the mix.

After the first day in the fully leaded soup I gave the flesh side a gentle scrape with a knife to tease off some of the large membrane bits that still persisted.

And so to the moment that the tannin solution is done with. I have to say that the family will come nowhere near these 'piscine monstrosities'. Comparing this shot with the image after the weak first solution shows how much tanning the skin has taken on.

In much the same way as a deer skin would be squeezed of any liquid so too must the fish skin. I started by wrapping the skin loosely over the line then folding the left hand edge over.

And then the right hand edge to form a sort of elastic band. I then inserted a stick into the loop at the bottom.

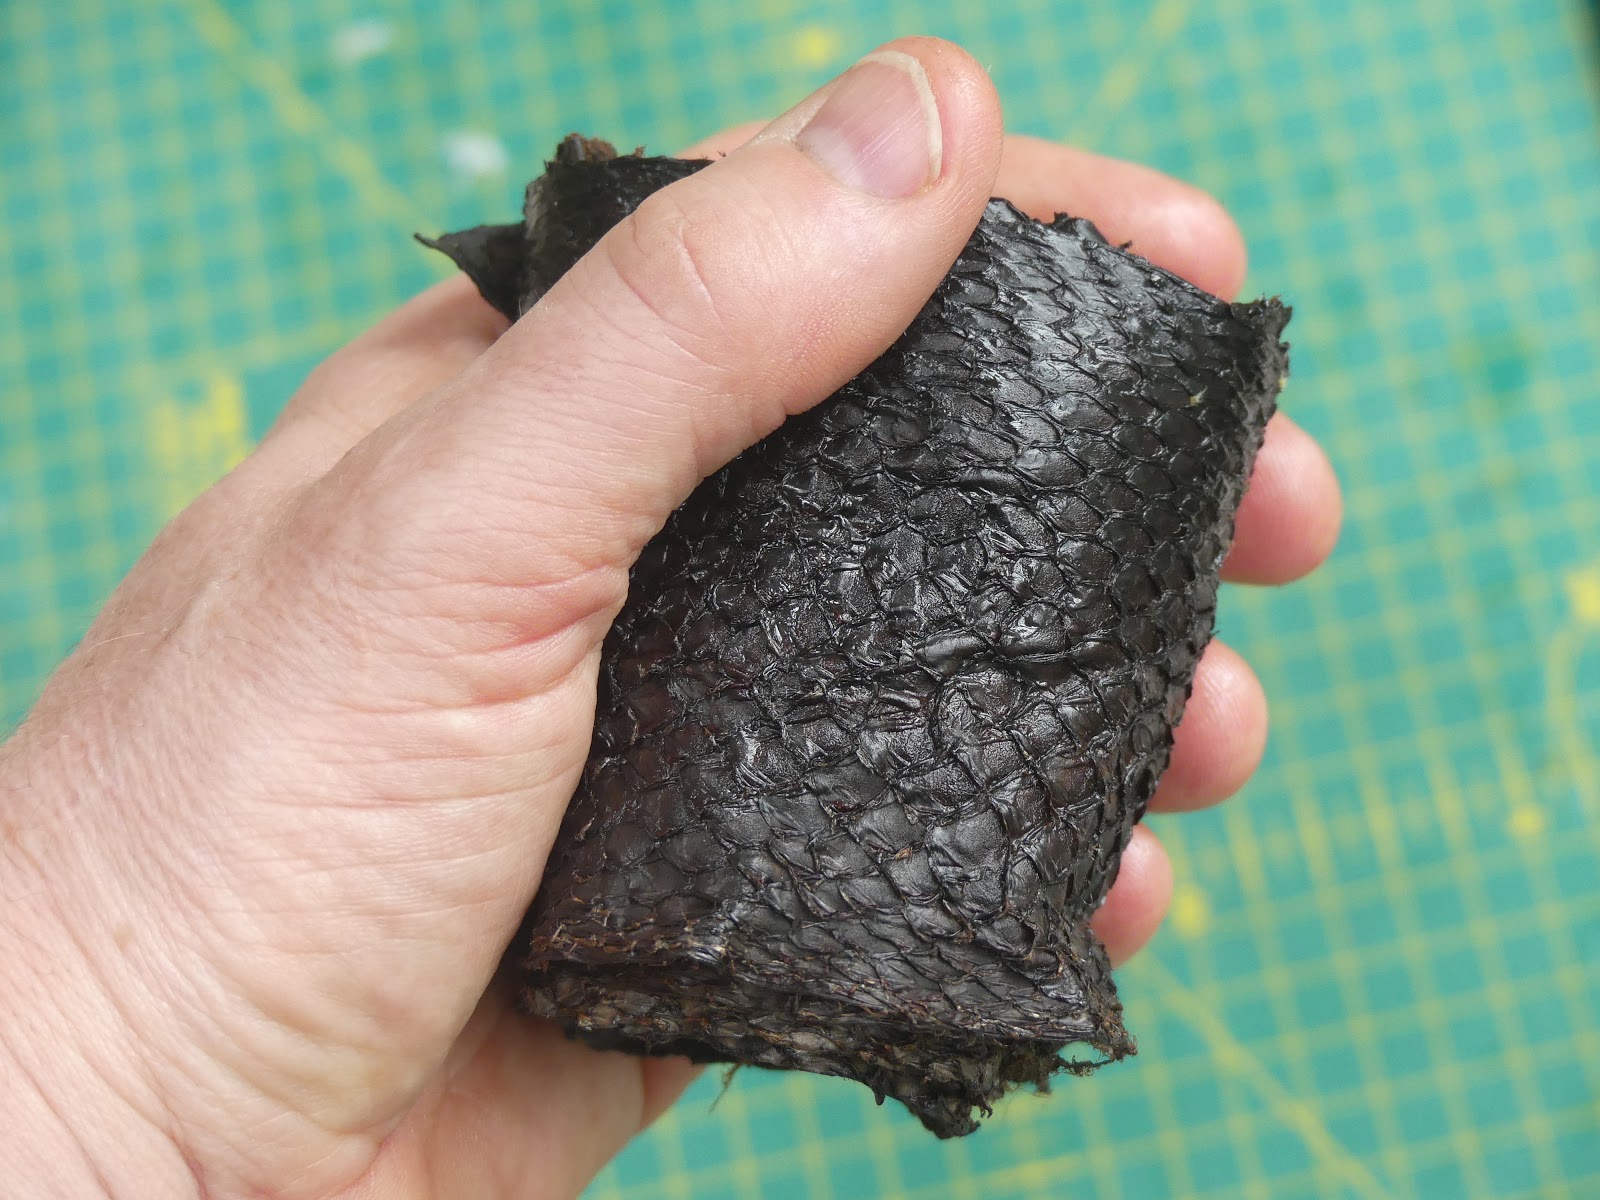
And then twist the stick around until moisture begins to express from the skins. Even from the first moments it was clear that fish skin really does deserve to be called leather because however hard I scrunched it up it just bounced back. see here for information on it's tensile strength.

I decided to do the serious stretching and softening outside with my foot adding support to the jig. The skins have already had several minutes of stretching during the tannin baths (it apparently helps absorption). The time the skins will need is variable but in excess of about an hour or two of stretching outside before they were dry is an average.
Towards the end you can feel the skin's physical properties changing. As well as using the jig I also pull it width ways by hand and it will suddenly just stay in the position shown above...
...Until I pull it length ways and it just pops back to it's original dimensions. even when you think it's done, keep going some more.

I also do a few small sessions on a garden wall to help get some more of the membrane off. You can see the treated skin flesh side on the right with the yet to be worked skin on the left.

Once I'd worked both skins I added some coconut oil to the flesh side which made it a beautiful dark colour and smoothed the surface out. You can see that the edges are a bit crinkly where it's hard to get decent purchase when working it, this can usually be trimmed off.

You can also darken the textured side with oil and whilst I like it I think I prefer it as it is. Not a deal breaker however.
And that's a wrap. I was generally happy with the results to the point that I decided not to smoke them. The edge of the skin in places however is a little rigid but I expected that because despite paying attention to the edges when working the skin it isn't easy to grip when softening. I'm hoping that when I trim the edges I'll be able to use the strips to produce a cordage to power a bowdrill set and add to my labour of love bowdrill page.
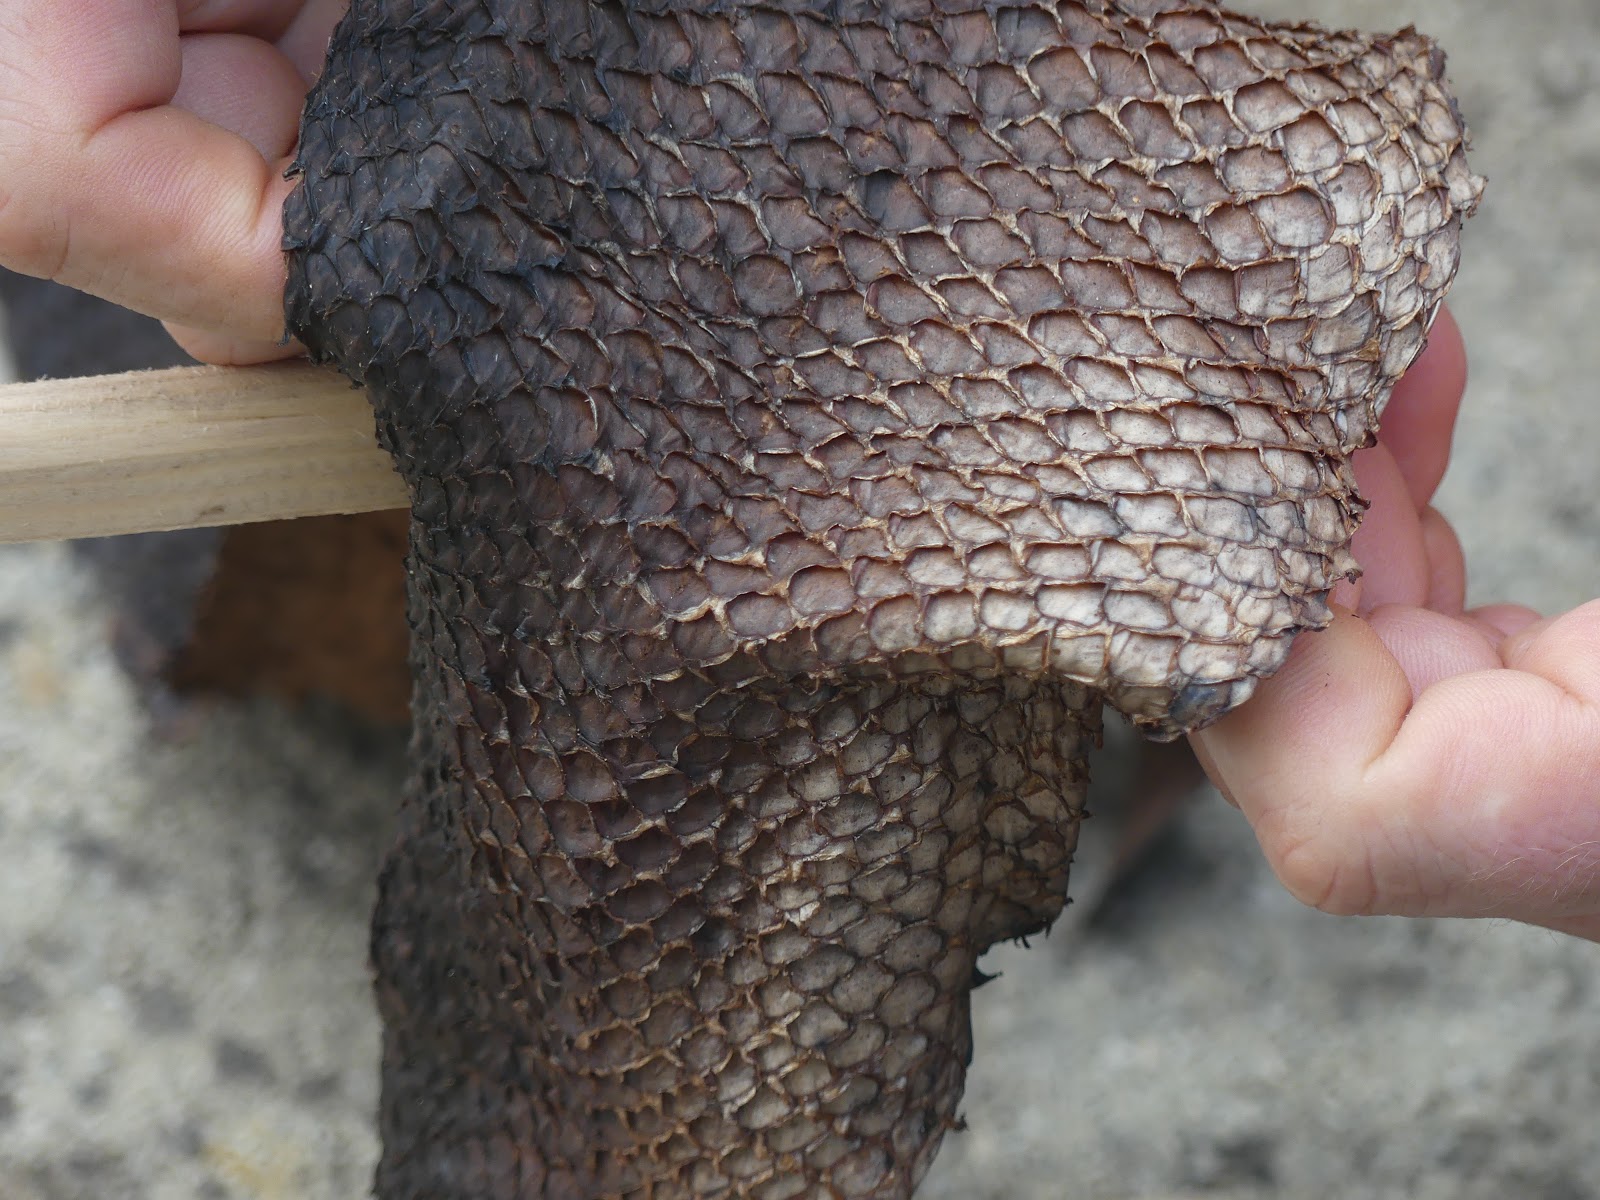
I'm certainly still a novice but all in all I'm happy with my efforts, having learnt a lot along the way, and as you can see from the above picture I can easily roll it which is a win in my eyes. But could I have done anything else to refine it?


This is a shot of some Spring sunshine illuminating the skin. Not only does it show some nice detail but it gives an idea of what it is like as a 'window' because apparently the Innuit used to use them in their homes.


I was rather pleased with the results so far although I know they could have been a little softer having handled a 'professional' skin on Will Lord's stand at this years Bushcraft Show. So it was onto the second set of skins I have which where prepped and frozen.
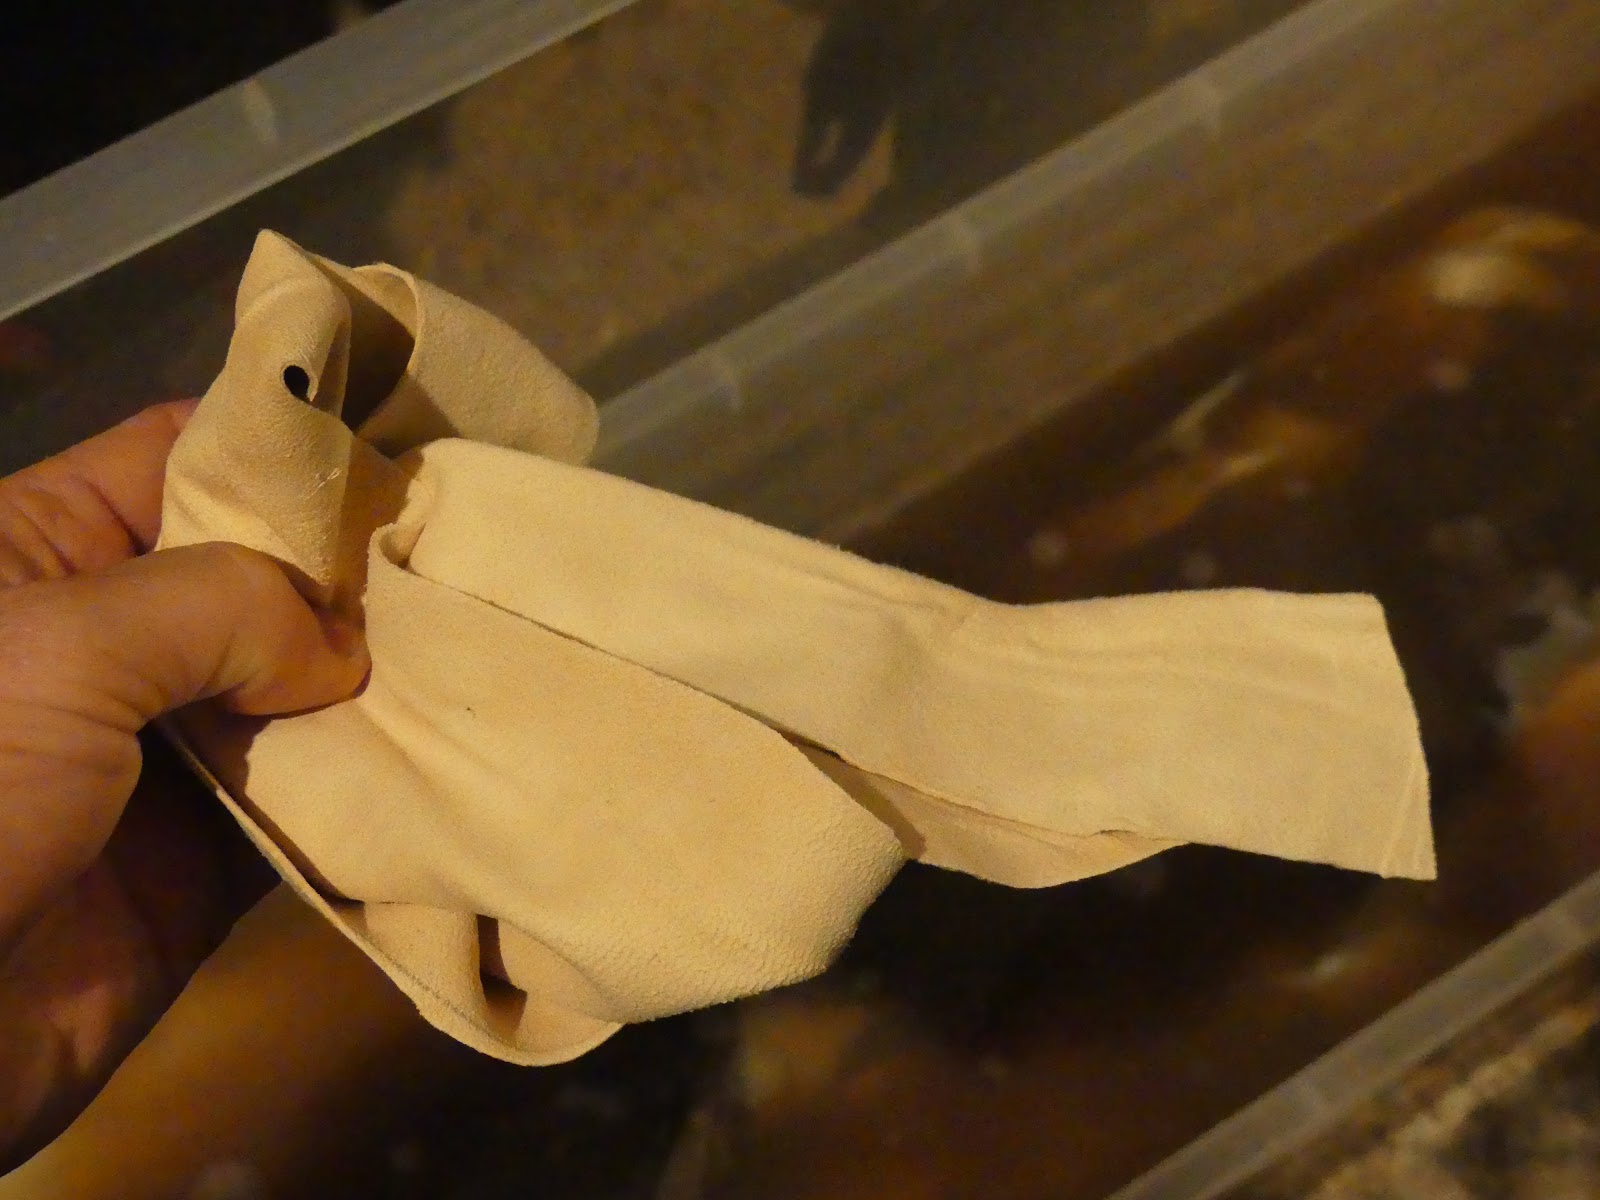
As an additional experiment I have veg tanned some chamois leather to the tannin mix. Actually it's 'Chamois' as this type of leather hasn't been commercially available for nearly a century. It's lamb hide.
During my research I'd read that tannin mix can go a little funky as bacteria gets to work and I have suffered from this in the past.

I keep coming back to the skins to remove any further membane on the flesh side and finish them by giving them a sand. In the above picture the top one is done and the bottom one is half and half.

This is a shot from left to right of the two recently done big skins, a thin sliver of the new skin and the two previous oiled up ones.


As the newer skins are noticeably thinner width ways they were a little curly so I re-soaked them and worked them some more and once done I used bag clips and a clamp to encourage them to straighten which they did a little but not perfectly.

If I decide to give the skins a smoke. I made a basic four-legged frame and use an old car cover over it. I have my honey stove made up with an aluminium serving tray over the top as a smoke retardant to allow it to cool before it reached the skins. The skins are mounted along their length by means of small pegs attached to a couple of old barbecue grills. . The box in the corner of the picture was to help guide the smoke up efficiently.

Buckskin is stitched together and made into a sort of funnel to smoke but as previously mentioned these skins are too thin so I elect to hang them via some paracord and mini pegs.

The heat source would be a few charcoal briquettes in a trusty Honey Stove which I placed to one side with foil over three quarters of the top. I then put the cardboard box over the stove with more foil over most of the top. The idea is that the foil will arrest the smoke rising and therefore cool it down, much like in a cold smoking process.

I use some slightly punky wood to generate smoke.


I generate the smoke for an hour or so until it started to get dark. One luckily short lived horror moment occurred once when I checked that it wasn't too hot inside. I thought that I'd shrivelled the skins but on closer inspection it was one of the car cover elastic straps!

It is worth you inspecting the foil and this shot shows it folded with the silver unsmoked stuff st the bottom and the visibly darker 'smoked' area. I feel that I've therefore given the skins a good smoky covering when it's like this.
No comments:
Post a Comment